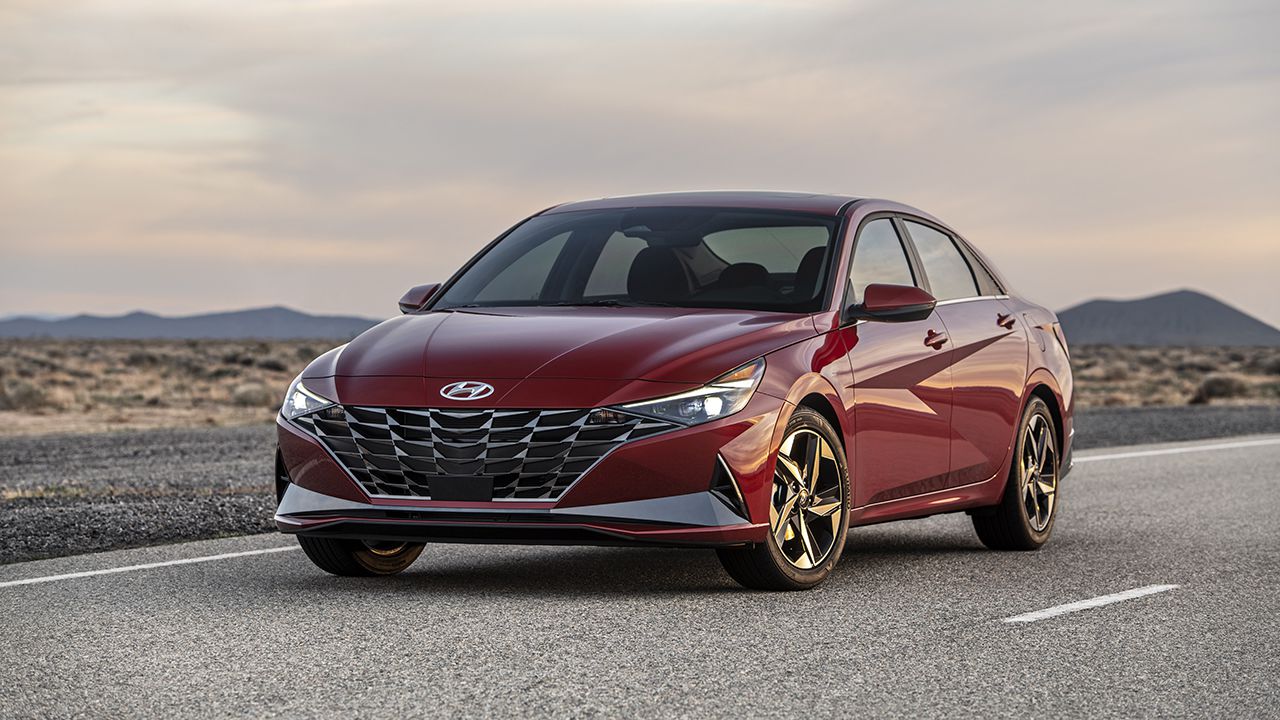
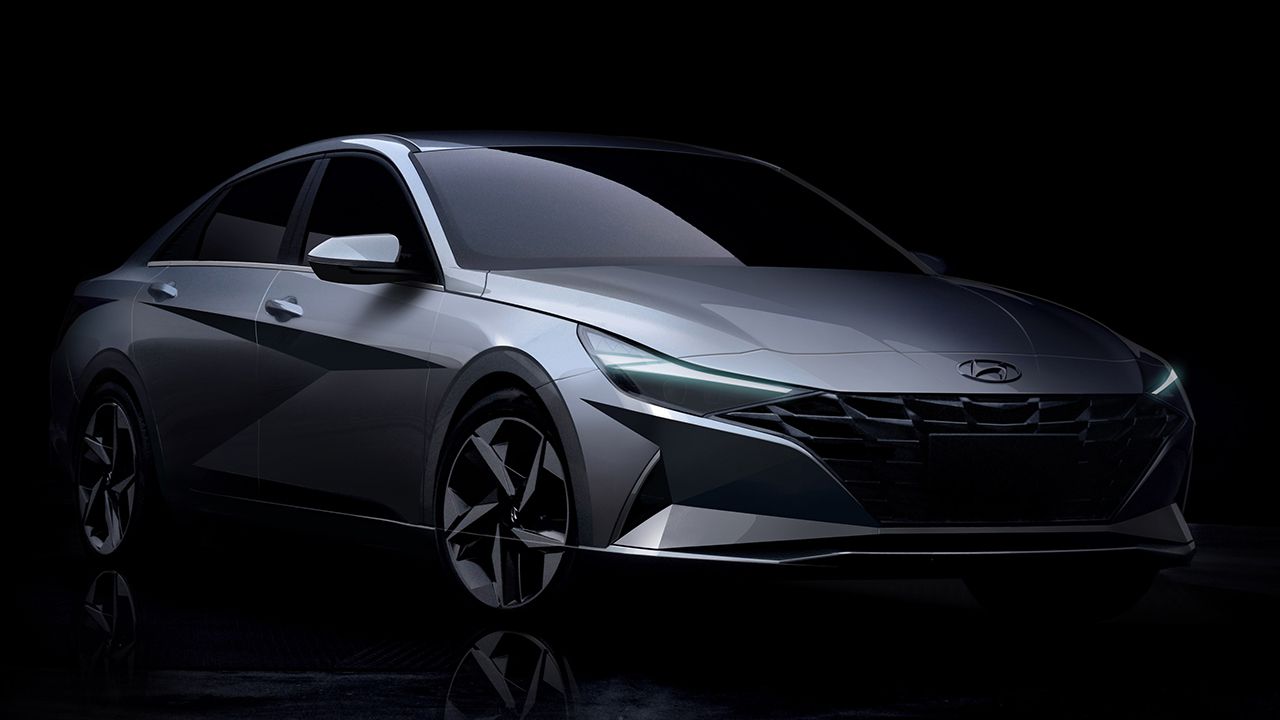
Hyundai has just introduced its newest sedan and it looks really sharp — offering an array of tech features and a hybrid variant that offers efficiency in fuel consumption.
The new Elantra’s exterior is pretty much highlighted by its angular, sharp lines along its side, fresh headlights and taillights, and a commanding grille at its front. Hyundai said it’s one of the biggest in size for its segment.
The body dimensions suggest that it’s longer, wider, and has longer wheelbase when compared to its predecessor. Inside, it translates to more legroom for the passengers.
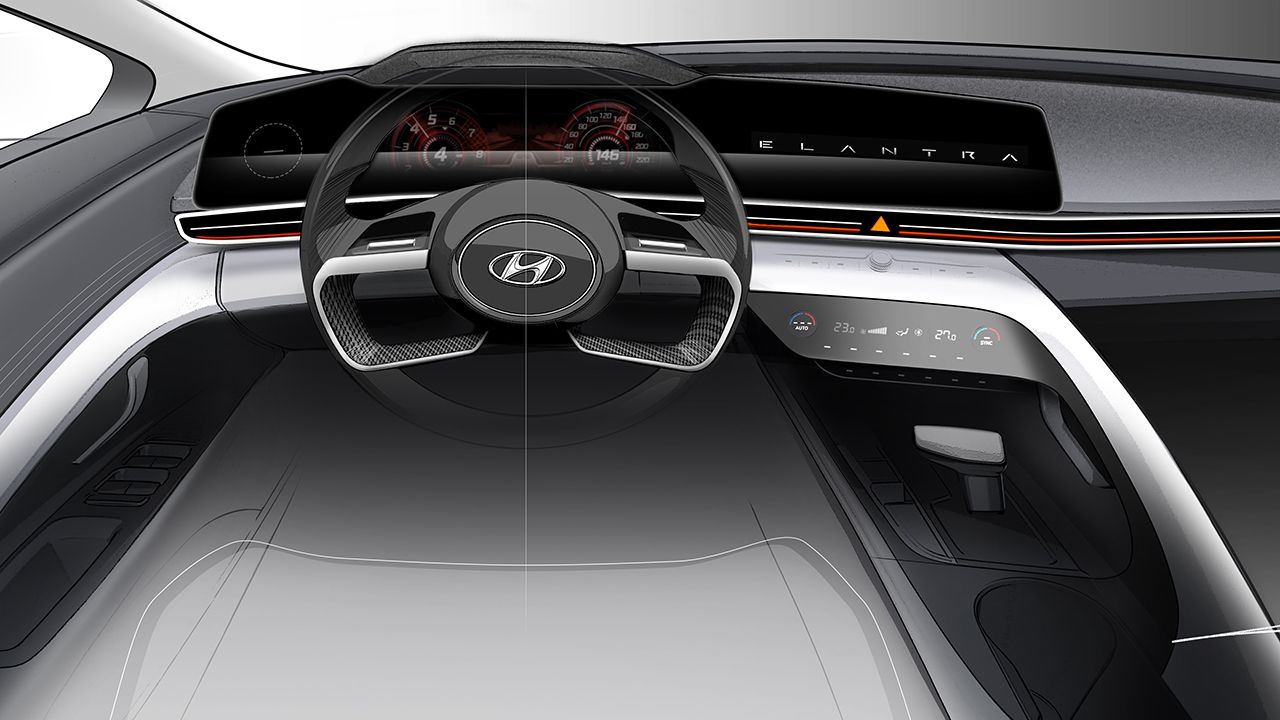
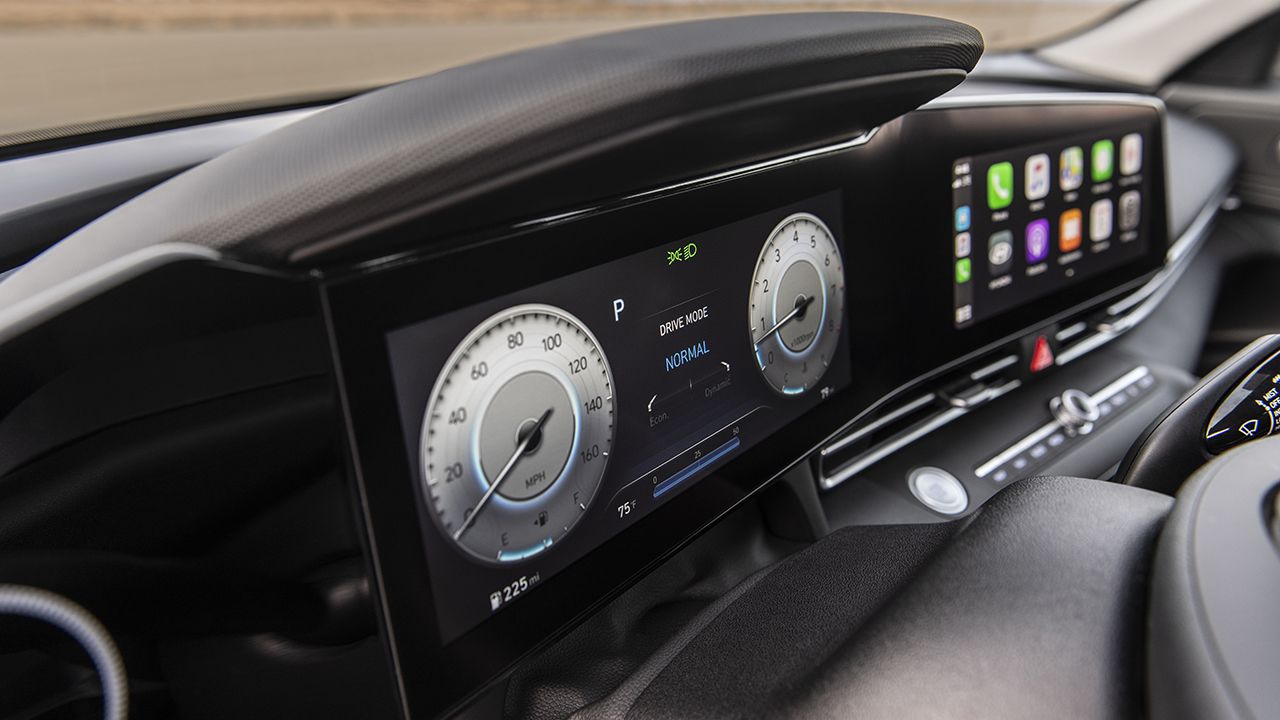
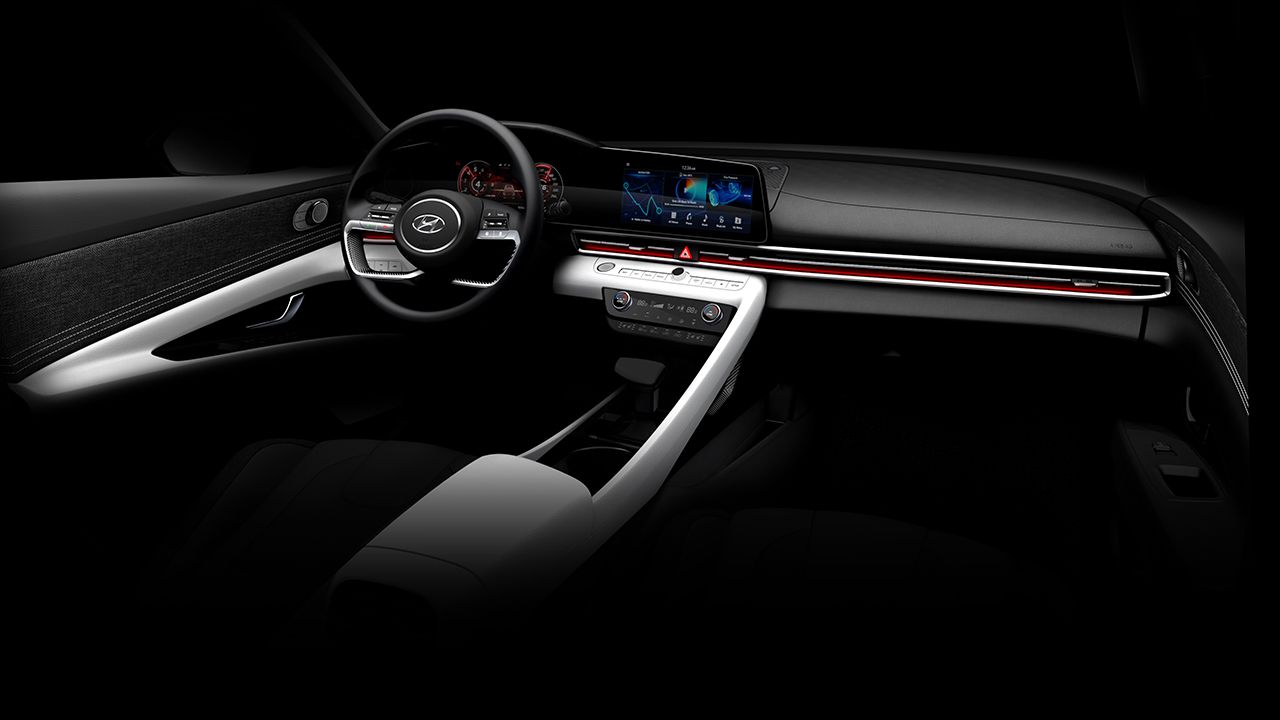
When it comes to tech and features, it’s got the bases covered. It comes with two large 10.25-inch displays (although appear as one long panel) that act as the digital gauge cluster and at the same time displays information for navigation, music, and menu. It also comes standard with Apple CarPlay and Android Auto.
Under the hood, the Elantra comes in a 2.0-liter inline-four engine with a continuously variable transmission. It outputs 147 horsepower and 132lb-ft of torque which, for its class, are generally low numbers.
It does have a more fuel-efficient counterpart, though. The Elantra Hybrid carries a 1.6-liter inline-four gas engine with a 43 horsepower electric motor that works in tandem to give you power while stretching your fuel consumption. Together, they have an output power of 139 horses.
The company promises that with this hybrid variant, customers will be able to reach a combined EPA rating of more than 50mpg.
As for safety, it’s equipped with forward-collision warning, lane-keep assist, and automatic high-beams. It’s also been reported that there will be a smartphone-based digital key system included.
The 2021 Hyundai Elantra sedan will be on sale in the US starting the fourth quarter of the year.
Gone are the days wherein toys were deemed purely child’s play. They’ve evolved into established products that appeal to the interest of adults and serious collectors alike.
With geek culture slowly becoming mainstream, a lot of our favorite characters, heroes, and pop culture icons are getting immortalized into plastic figures. As such, now’s the perfect time to get into the engaging world of toy photography.
An art form and a hobby that enables one to express creativity and passion, toy photos tend to bring forth happy memories we had as children.
And this feeling is what every toy photographer hopes to arouse from their viewers.
What detracts most people from delving into toy photography is the notion that you need professional-grade equipment, fancy set-pieces, meticulously crafted dioramas, and years of experience to produce stunning shots.
In truth, all you need is a basic understanding of photography, a camera, a keen eye for spotting locations, and your boundless imagination.
What camera do I use?
The biggest question the novice toy photographer usually has is which camera is best to use in this hobby.
The truth of the matter is that almost every camera conceivable can be used, it just depends on what you’re really comfortable with and what is already at hand.
I shall discuss some good and bad points on some of the most commonly used cameras in this hobby to help you choose what’s right for you.
Phone Cameras
To be blunt, phone cameras could never match the versatility a DSLR/mirrorless camera brings to the table.
Their biggest difference is the phone cam’s inability to utilize native and dedicated lenses.
Despite the disadvantages, phone cams remain a great contender for toy photography chiefly because of the low barrier of entry one needs. And if you’re still iffy about shelling out a pretty penny, phone cameras are a great way to just get started.
Camera phone pros:
Accessibility – you have your phone with you 24/7, whenever the creative spark comes your way, you can easily whip it out and begin shooting.
Ease of use – most phone cameras are tailor-built to epitomize the point and shoot concept, often delivering stunning quality with little to no hassle of tweaking the settings. Even the editing apps made for phones offer extreme user-friendliness to beginners as compared to some dedicated photo editing software.
A cost-friendly one-stop-shop environment – No need to buy expensive equipment and software. Usually, phones allow you to shoot, edit on its built-in photo processing app, and directly upload into social media sites without the burden of using a computer.
Camera phone cons:
Inability to change lenses – although lens attachments for phone cams are available to achieve varied effects, dedicated native lenses still bring a huge gap in quality when it comes to the end product. Achieving natural bokeh, shallow depth of field, and playing with real different focal lengths is simply out of reach.
Low-light performance issue – bigger sensors simply obtain more light information, something phone cams are definitely lagging in due to physical constraints. Even the latest phones equipped with snazzy night modes could never produce quality low-light pictures.
Severe limitations – Phone Cams have a fixed aperture, smaller sensor, and a lower resolution compared to a DSLR/Mirrorless Cam.
DSLR or mirrorless cameras
DSLR or mirrorless cams are kings when it comes to churning out quality photos.
With the versatility of being able to utilize hundreds of varying lenses that sport different effects and focal lengths, to the ability to perform greatly under low-light conditions.
DSLRs and mirrorless cameras truly trump the competition, it does, however, sport some disadvantages as well.
DSLR/mirrorless pros:
Lens Versatility – Possesses a huge array of dedicated lenses that could be utilized in almost any situation.
Bigger light sensors – Physically has bigger sensors allowing a strong performance when it comes to low-light situations.
Better image quality – with the above-mentioned strengths combined, phone cams can’t readily compete with the resolution and quality that DSLR/ mirrorless cams produce.
DSLR/mirrorless cons:
High barrier of entry – besides the obvious cost constraints, these types of cams require a bit of a learning curve to master.
Non-inclusive environment – Phone cams are the clear winner when it comes to its all-encompassing ability to shoot, edit and upload under one environment. Although some DSLR/mirrorless cams allow these kinds of integrations, more often than not, a dedicated editing program on a computer is needed to achieve great results.
Lights, lights, lights!
George Eastman, the Kodak Company’s founder famously quipped, “Light makes photography. Embrace light. Admire it. Love it. But above all, know light. Know it for all you are worth, and you will know the key to photography.”
Effective lighting could be used to tell stories, enhance your subject or set an overall mood for your toy photographs.
Without light, photography is simply impossible, so a basic understanding of this is vital. Here are some types to help you determine what to use in any given situation.
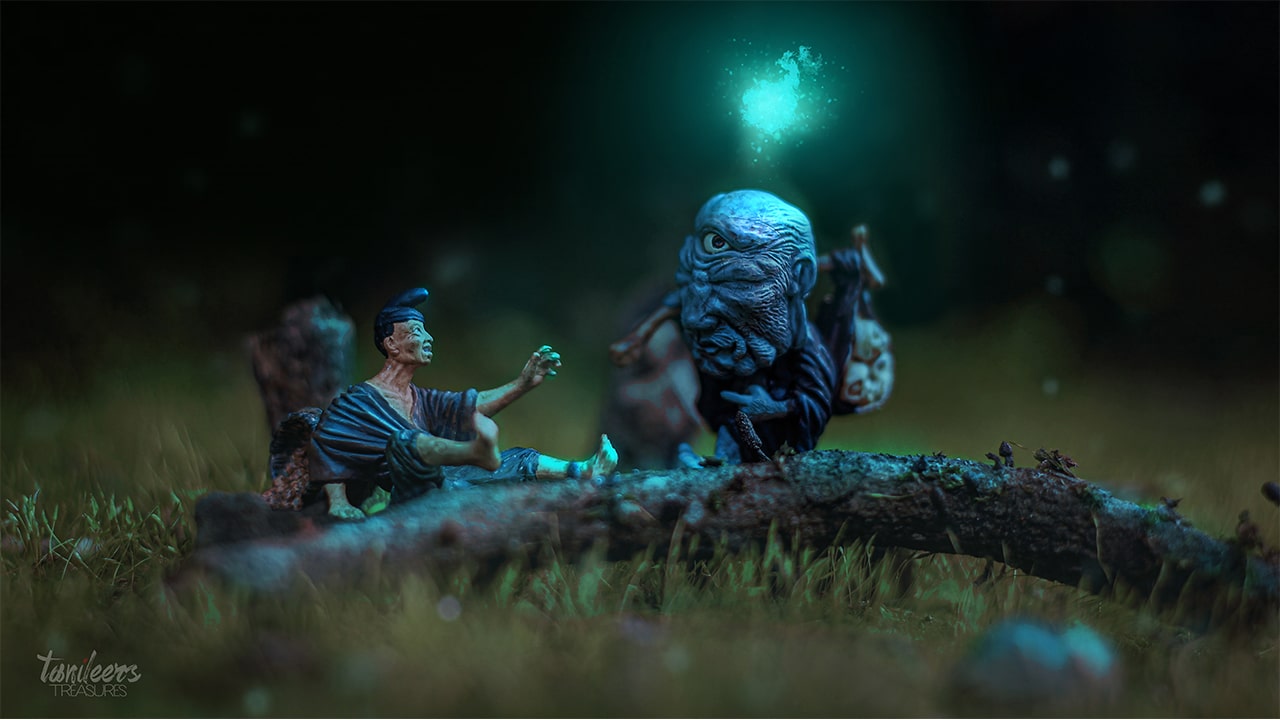
Ambient light (natural light)
My personal favorite. You’d be using the sun as your light source.
1_0002_The Modern Creatures - Ivan Luz - Toy Photo 11
1_0005_The Modern Creatures - Ivan Luz - Toy Photo 8
Knowing how the sun is cast at specific times of the day would greatly help you achieve your desired results.
The only downside to this is that you are subjected to the whims of the present weather and you are working on a limited amount of time, adding a layer of inconsistency and unpredictability.
Toy Photography - Joseph_0003_4
Toy Photography - Joseph 1
Helpful tip: Utilize the golden hour, a period of daytime usually after sunrise or before sunset. This light contains a magic mixture of soft and hard light, giving your pictures an added beauty boost.
Artificial light
You’d be using dedicated lights for a more controlled setup. Very favorable for indoor shooting.
1_0001_The Modern Creatures - Ivan Luz - Toy Photo 13
1_0004_The Modern Creatures - Ivan Luz - Toy Photo 9
1_0000_The Modern Creatures - Ivan Luz - Toy Photo 20
Consistency is expected with this arrangement and is achievable at any hour of the day. Traditionally, studios lights are used, but any available light source you have lying around could be utilized.
Helpful tip: There are countless ways to artificially light your subject, but a sure lighting technique that could get you thru your beginner toy photography journey is the 3-point lighting method.
Toy Photography - Joseph_0007_7
Toy Photography - Joseph_0006_6
Toy Photography - Joseph_0008_8
Set up a key light (main light),a fill light (side light) to eliminate unwanted shadows, and a back light (edge light) to establish the distance of the subject from the background.
Choosing your subject
Basically, any toy is fair game, but I’ll be shedding some light on a few popular toy types and how to tackle them.
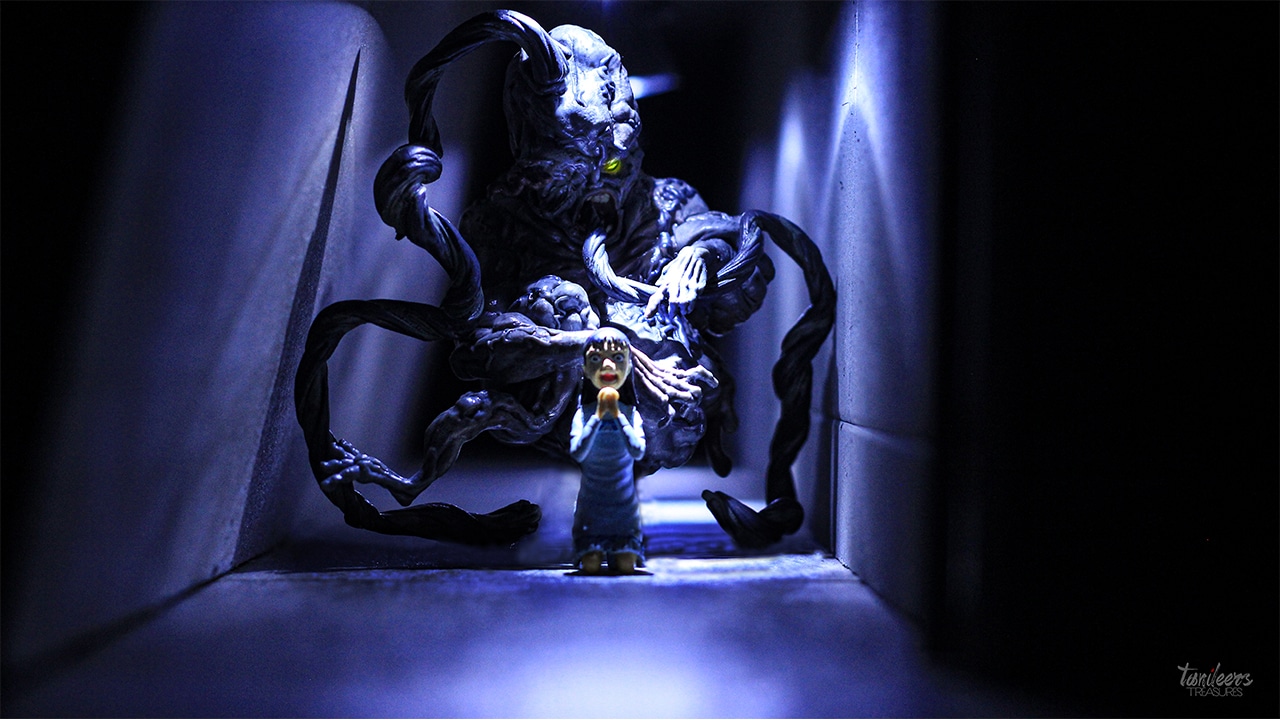
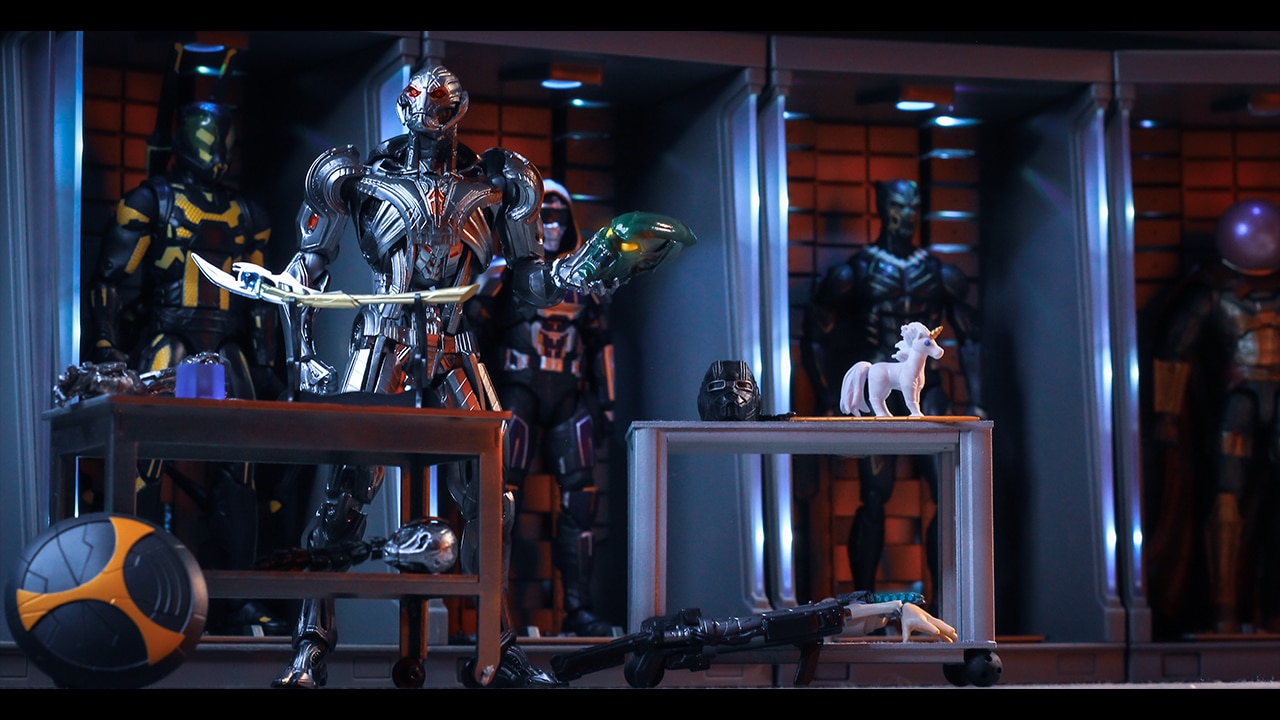
Titan/Gigantic – Usually monsters, giant mecha, dinosaurs or anything titanic in scale. Low angle shots best fit this to establish size and power. Additional miniature elements and dioramas also help sell the effect.
Articulated action figure – The most popular among the types. Articulation allows the figures to achieve dynamic positions that tell stories and convey actions. Limitless posing capabilities allow a myriad of situations to be represented. Almost any photographic approach could be used.
Statues/Static Figures – the lack of dynamism and the ability to change positions is compensated by extreme detail and realism. Best used on compositions that require a very thin blur from reality as the lack of articulation pegs make them more parallel with the real characters they represent. Almost any photographic approach could be used.
Building toys (e.g., Lego) – with an endless possibility of combinations, worlds, and themes that could be built, these prove as versatile and fantastic toy photography subjects. Macro Photography is the best approach to tackle this. Tilt-Shift Photography could also do wonders for built worlds.
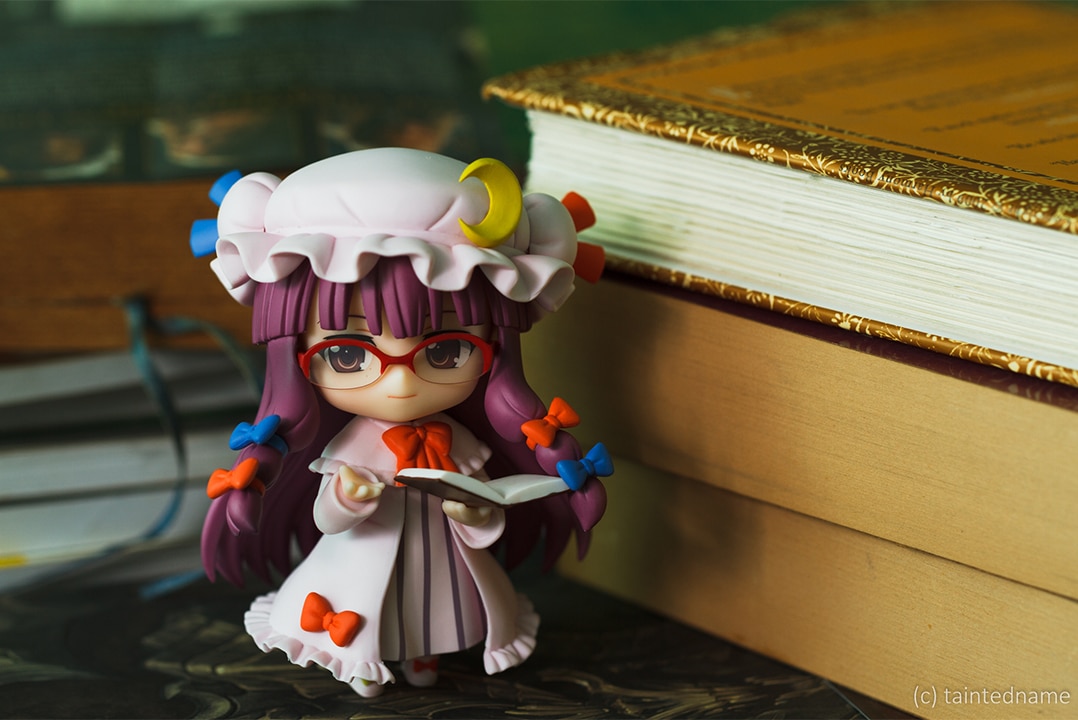
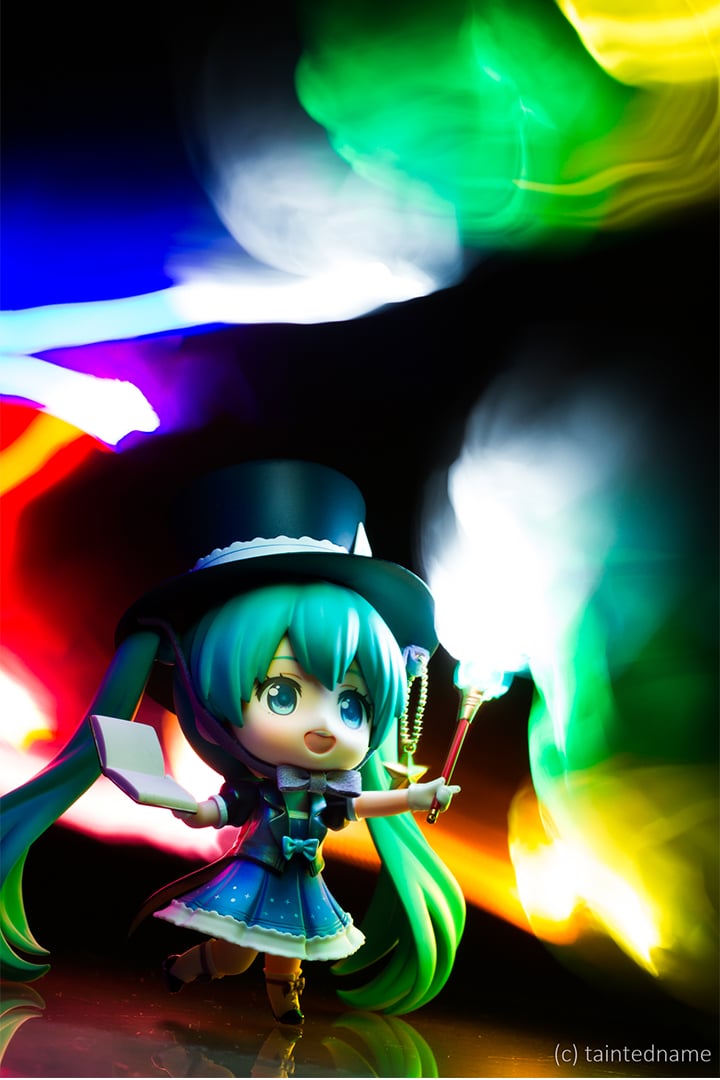
Chibi (e.g., Nendo/Funko) – with their cute and endearing nature, a shallow depth of field is best used to highlight their kawaii features. Top-down shots are also effective in showing the miniature world they’re set up with.
Helpful tip: Use the same scale for toys when including multiple subjects in a shot to maintain consistency in the composition.
Some common toy scales are 1:6 (approx. 12 inches), 1:12 (approx. 6 inches), 1:18 (approx. 3.75 inches). For photo manipulations/composites, use the same focal length in taking pics of the various elements to be combined to ensure seamless blending.
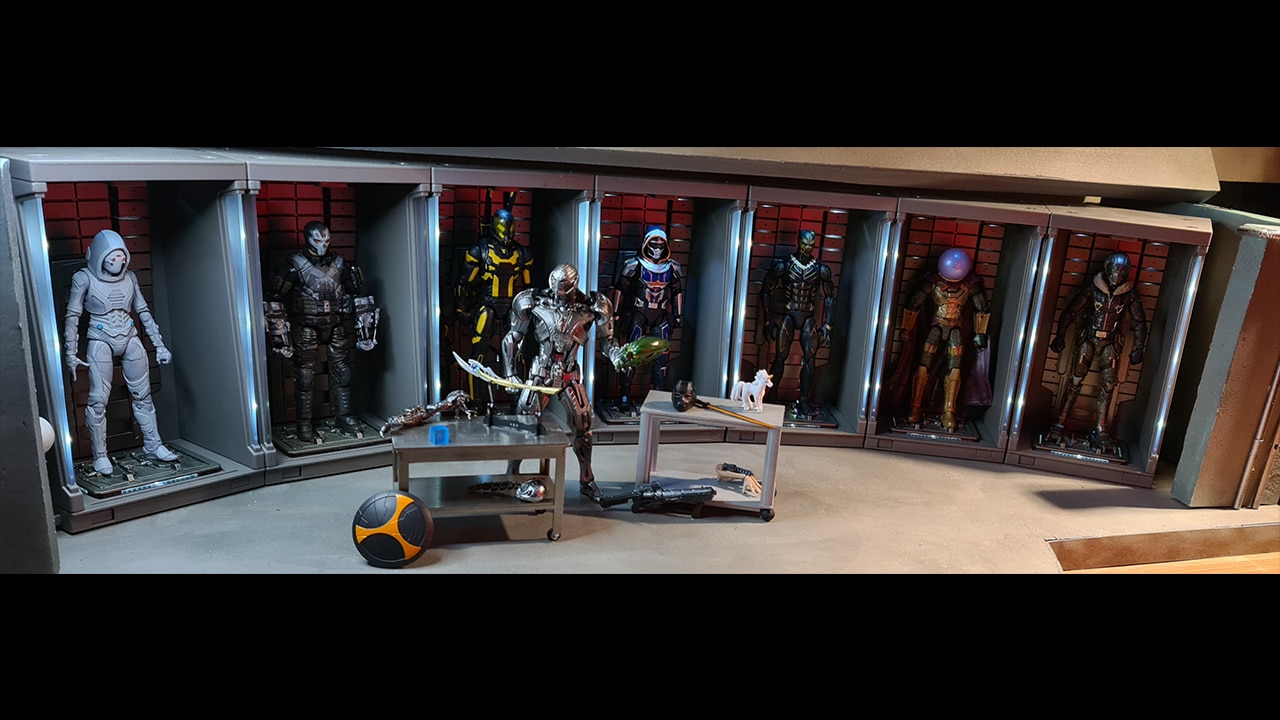
Location and scene setup
A commonly overlooked aspect of toy photography but one of the most vital components.
Effective location hunting/scene setups help sell the world you want to portray.
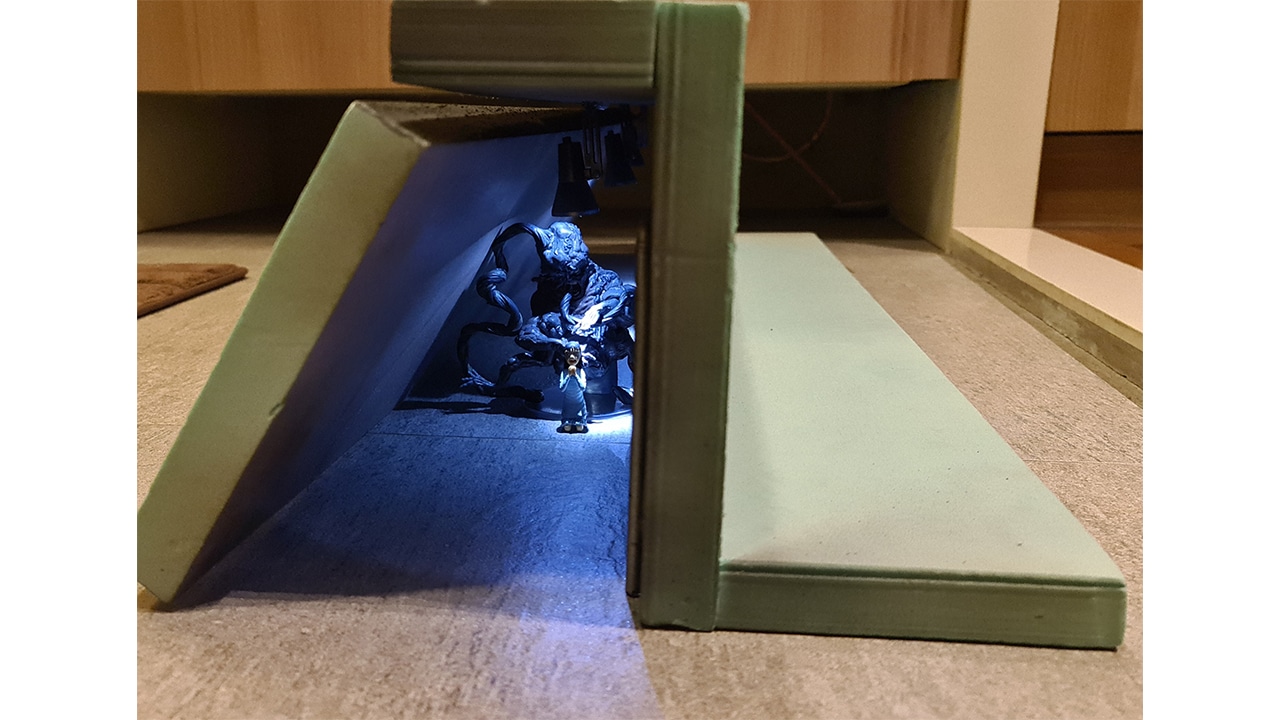
A common misconception is that you need intricate dioramas to achieve the money shot. While dioramas massively help a ton, not all toy photographers have access to this as they take a certain expertise to make, is cost inhibitive and they do take up huge chunks of space.
If these downsides do not affect you, then I highly encourage the use of dedicated dioramas, but if one is simply inaccessible then everyday objects and locations could all be transformed into fantasy worlds.
Twigs can be mighty trees, bushes can be lush forests, little streams can be raging rivers, creatively folded cardboard could be great halls, laundry baskets could be spaceships, etc.
In the miniature world just about everything could be used in your worldbuilding, all you need is your keen eye, a knack for imaginative framing and your limitless child-like wonder.
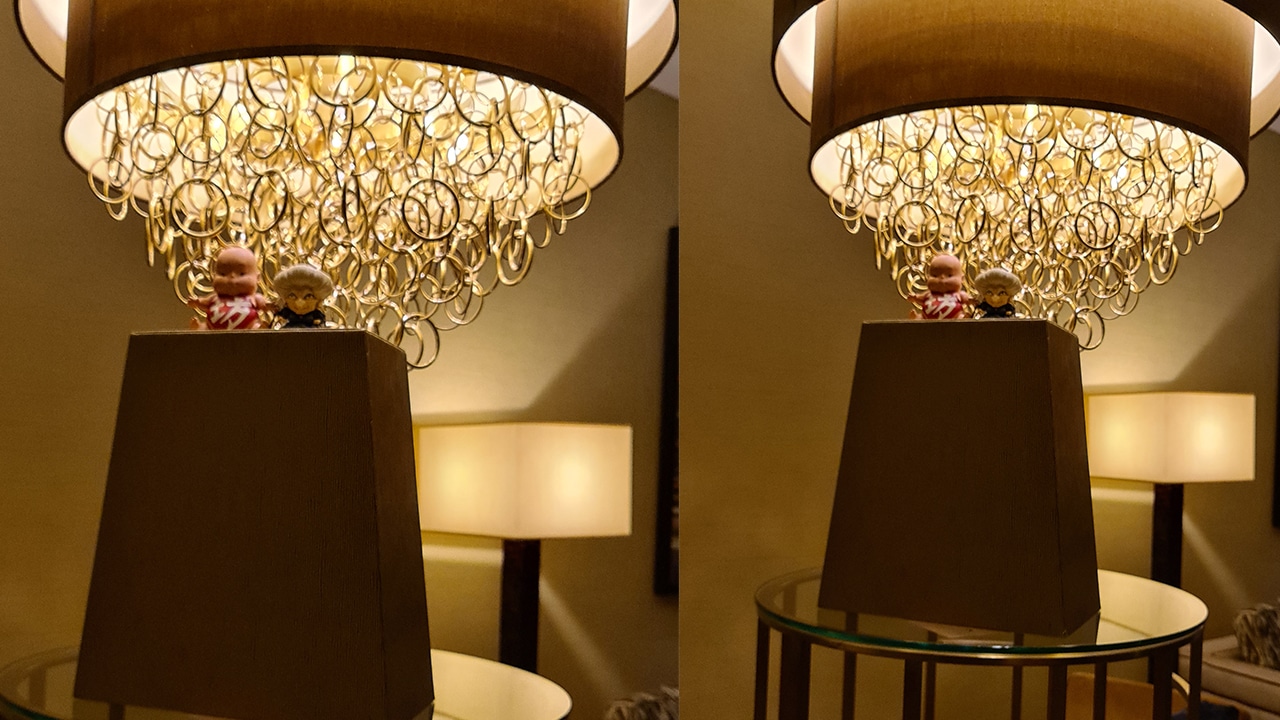
Helpful tip: If outside locations aren’t viable, printed backdrops often do the trick.
Tarpaulins and photo paper backgrounds translate well into the camera. Computer screens, TVs, and display tablets also serve as excellent background sources for your shots.
Additional elements from everyday objects to use as foreground or background props often do wonders as well.
If you want to go the chroma keying route (green screen/blue screen), I strongly suggest using a solid color (yes, any color that is not present on your subject’s borders) that is nearest the background that you would use for an easy and coherent composite.
Tangible or photo-manipulated (CGI) toy photography
Tangible toy photography employs a strict adherence to the usage of practical effects and set pieces to achieve desired results.
How you were able to set up your scene and subject directly translates how the end result of the shot would look.
It offers a more organic feel, as viewers could mostly spot if a shot has been infused with special effects.
Cardboard speech cutouts, dioramas, natural backdrops, pyrotechnics, etc. are all employed to help create the world/scene you want to portray.
A strong proponent of this toy photography style is the movement known as ACBA (Articulated comic book art).
With powerful computers/phones more accessible nowadays, the use of photo manipulation or CGI in toy photography has seen a huge surge in popularity.
Incredible worlds and complex scenes could all be achieved using the computer/phone without the hassle of set building or diorama setups. When done seamlessly, it is often hard to discern from the tangible ones.
Besides the obvious cost and time-saving benefits this method entails, it also allows impossible scenes otherwise unattainable with practical methods.
A strong imagination is key when solely relying on this method and programs/applications needed to achieve this does involve a bit of a learning curve to effectively use since it involves technical skills with certain programs.
Both disciplines have their strengths and situational applications, more often than not, toy photographers strictly follow a single discipline which creates a big divide among the community.
I personally believe knowing when to use both and effectively combining both is key to achieving flawless photos.
Final thoughts
As you start your toy photography journey, do not be pressured to instantly churn out jaw-dropping or perfectly made photos.
Oftentimes, simple but substantial works done with passion stand out.
A slow but sure progression is key, and mistakes should be welcomed with open arms.
Constant trial and error prove to be rewarding when you finally achieve the shot that you want. Imagination weighs more than calculated methods and stringent rules.
Find your comfort zone, be it gear or style, and master it.
Do not be trigger-happy with constantly purchasing and upgrading gear, make do with what you currently have and slowly invest in gear that best suits your style.
Do not be afraid to reach out to other toy photographers, and be involved with the community as it is a treasure trove of knowledge that could help you improve your craft.
Have that child-like inquisitiveness that constantly hungers and aims to learn new stuff. Experienced ones are more than willing to help share and impart their expertise.
The support and encouragement of the community also help foster self-confidence for you to be able to take this hobby to the next level.
Above all, have fun and pour your love into what you’re doing. This is all about expressing and sharing the things that continue to inspire us and give us genuine joy.
Author Ivan Luz, is a long-time toy photography hobbyist You can find him on Instagram as @tanileers.treasures.
Additional photos from photographer Joseph Duque, @sephduxytoyphotos on Instagram.