Samsung explains screen burn-in on OLED TVs

The demand for OLED TVs is still on a steady rise in 2021. According to Consumer Reports, more brands are expected to come out with entry-level OLED sets to make it more accessible to people looking for affordable TVs with 4K quality.

That being said, however, the concern over screen burn-in is expected to also grow alongside it. But what is it exactly and what causes it?

https://www.youtube.com/watch?v=y4mDMEb5trY&t=6s

Simply known as “burn-in,” this is a permanent defect in areas of a TV display that can be caused by cumulative effects of displaying the same image or scene for long periods of time. This usually starts as an image retention—when a TV shows what appears to be a shadow of the original image even after it has disappeared.

OLED displays are much more susceptible to burn-in because it relies on the self-emissive nature of its individual pixels. Therefore, when a TV is on for hours, the pixels that light up a static image can “burn-in” due to pixel aging with its brightness diminishing to a lower state.

In the past, there have been reports of OLED TVs installed at prominent spots such as the Incheon International Airport that showed signs of burn-in that can make customers worry about the long-term reliability of the device.

OLED TV owners might be able to fix the problem and prevent permanent damage by turning down an OLED TV’s brightness and avoid leaving static images on for several hours or even days. Some displays have “pixel refreshers” that automatically shift an entire image on TVs by a few pixels.
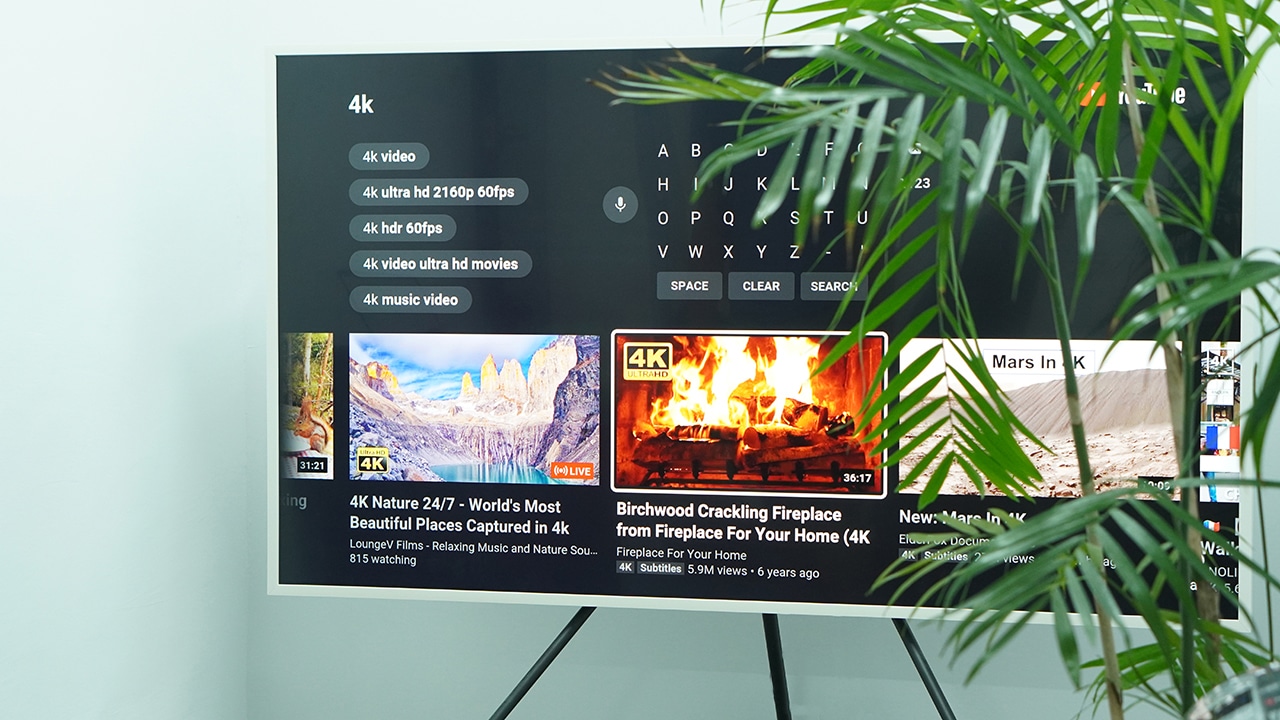
They can also prevent burn-in by consuming less of certain types of content that show static graphics remaining on screen for a long period of time. These types of content can include news channels and live sports that show scores, tickers, and channel logos as well as video games that show health meters, status bars, or maps on a certain part of the screen.

But even then, there is still a possibility that some images will be retained. The static image somewhat disappears when switching channels but eventually, it becomes a major cause of concern when the image is already transfixed on the same spot. It becomes a constant eye-sore and the only way to enjoy watching their TV again is by buying a new one.

To check for burn-in, a popular method called the gray screen test will let you see image retention and burn-in more clearly. Samsung has also developed a burn-in detection video test for easier checking.

If you’re an OLED TV owner and are looking to switch, consider opting for a QLED TV instead because this TV technology uses a backlight to provide brightness. This means that the pixels aren’t susceptible to uneven aging, which ensures that the screens are safe from burning in.

Search

3 easy steps to start Bitcoin mining today

With Bitcoin prices soaring to a high of US$ 41,973/BTC in early January of this year, many people are giving a second look at how they can get into this modern-day goldmine.

Understanding cryptocurrency, blockchain, hashrate, mining pools, and all the other crypto mumbo-jumbo, however, is a big obstacle for those of us who aren’t tech wizards. Like me, most people are curious about mining for Bitcoin but don’t necessarily fathom how ‘mining’ on the internet happens.

Fortunately, you don’t need to understand all of it to start earning some Bitcoin. The best and most practical way of knowing whether Bitcoin mining is for you is, incredibly, by just doing it.

I was encouraged when I watched an 11-minute video by Tech Inspected where he explained in very clear terms how to get started with mining. Here, I will show you what I learned, along with answers to the questions I had when I began to try out Bitcoin mining.

If you’re wondering about hardware, the general understanding is that anyone who has a PC with a relatively powerful graphics card — at least Nvidia GE Force 10 series or AMD counterpart — can mine.

In the spirit of ‘learn-by-doing’, here’s a simple, three-step process anyone can do to start mining:

Create a Nicehash account

I’ve found Nicehash to be the simplest, easiest-to-use miner out there, and it’s perfect for beginners. No need to figure out scripts and pool addresses and other seemingly arcane complications that other miners require. Nicehash even automatically creates a Bitcoin wallet for you where it will deposit your earnings. No-fuss, no worries, all done without any effort on your part – which is the beauty of crypto mining in the first place.

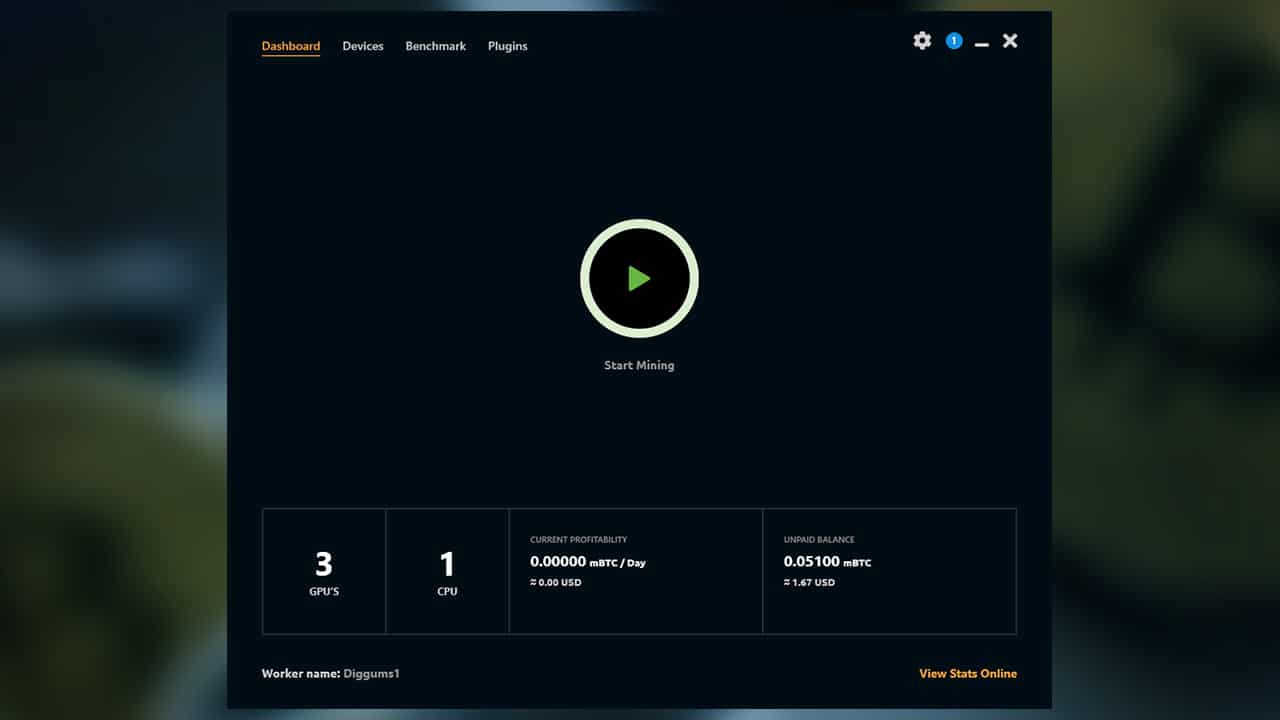
You just download the miner, input the Bitcoin wallet address provided by Nicehash, press ‘play’, and it’s good to go. You can mess with the settings later once you’re more familiar with the program. For now, just press ‘play’ and let your graphics card work.

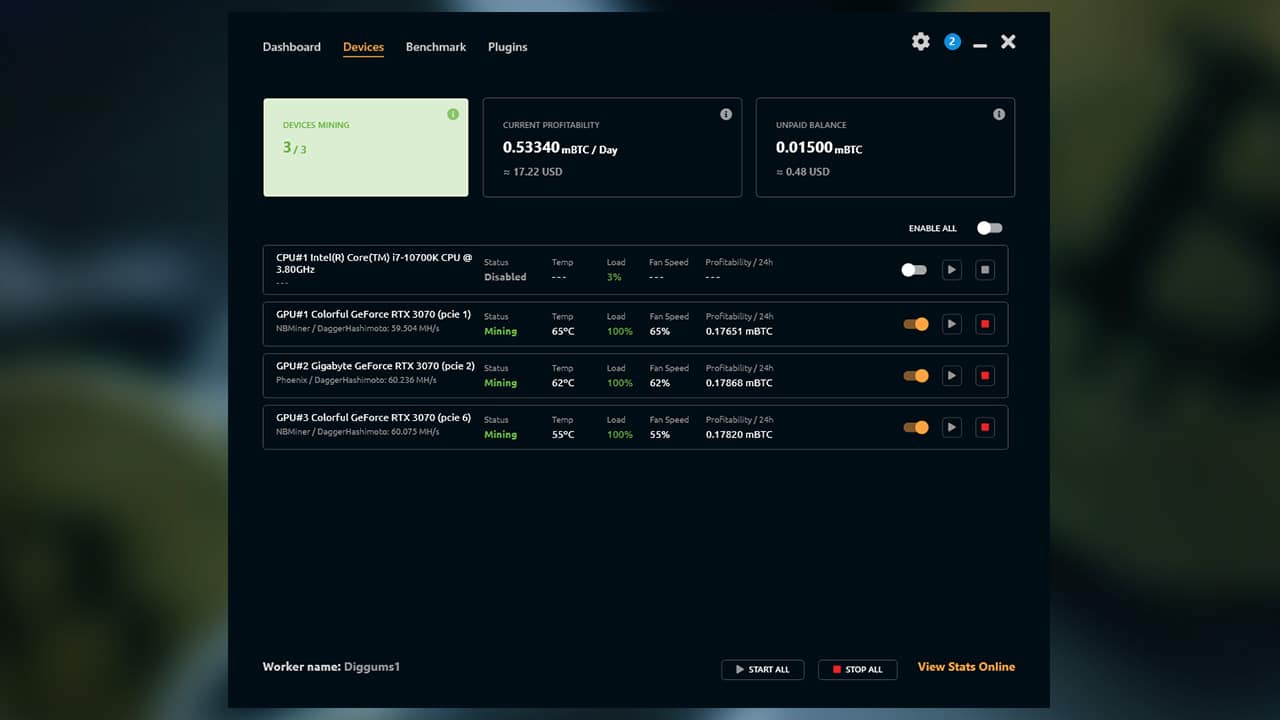
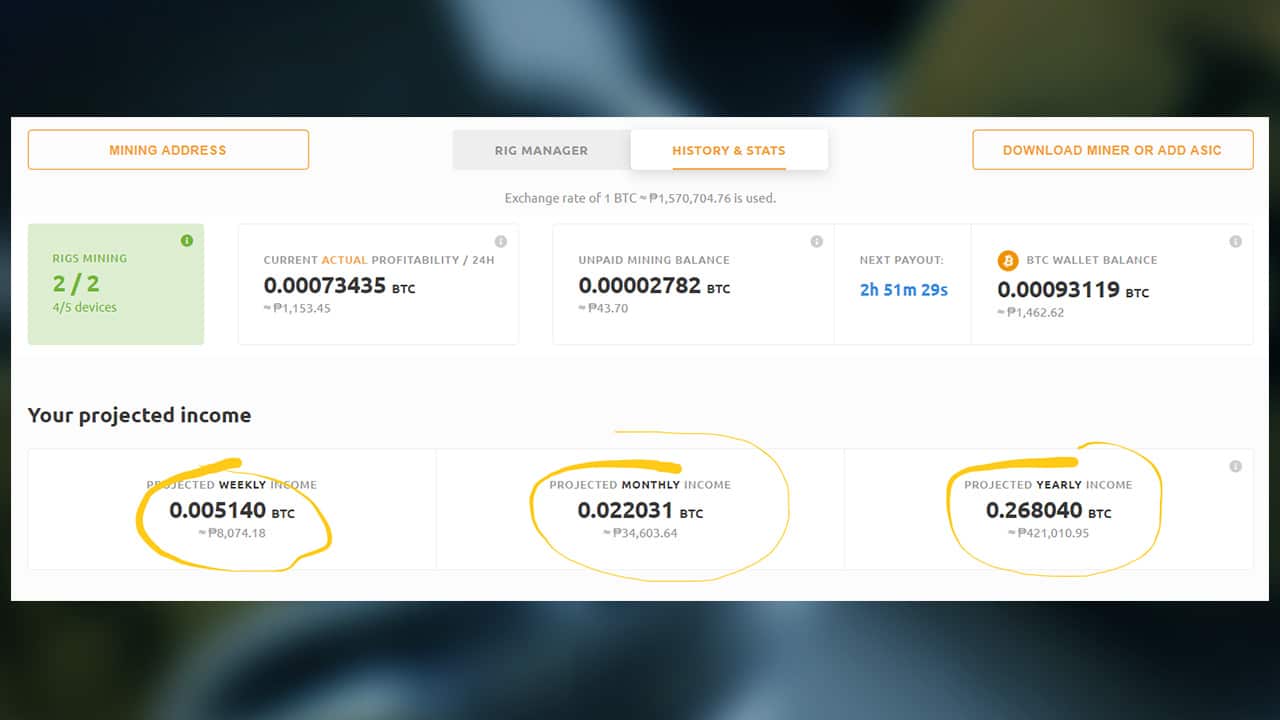
Now, don’t expect to mine a lot of Bitcoin right away – you’re likely just mining with one graphics card and you’ve just started. Give it some time – a day or two if you have the new RTX30 cards, maybe a week if you have the older cards. You can check the profitability of your rig through the Nicehash miner.

You can even find out your projected weekly, monthly, and annual earnings on your Nicehash account.

If you’ve done Number 1, then technically, you’re a miner already (maybe I should’ve titled this article ‘1 Easy Step To Start Mining’?). Congratulations, now you have some Bitcoin.

But naturally, you have pertinent questions like “HOW DO I TURN THESE SHINY BITCOINS TO PHILIPPINE PESO?” After all, your local 7-11 doesn’t accept Bitcoin as a valid form of payment yet, right?

Create a Coins.ph account

Coins.ph will let you convert Bitcoin into Philippine Pesos. To do this, you have to move your Bitcoins from your Nicehash wallet and transfer it to your Coins.ph account.

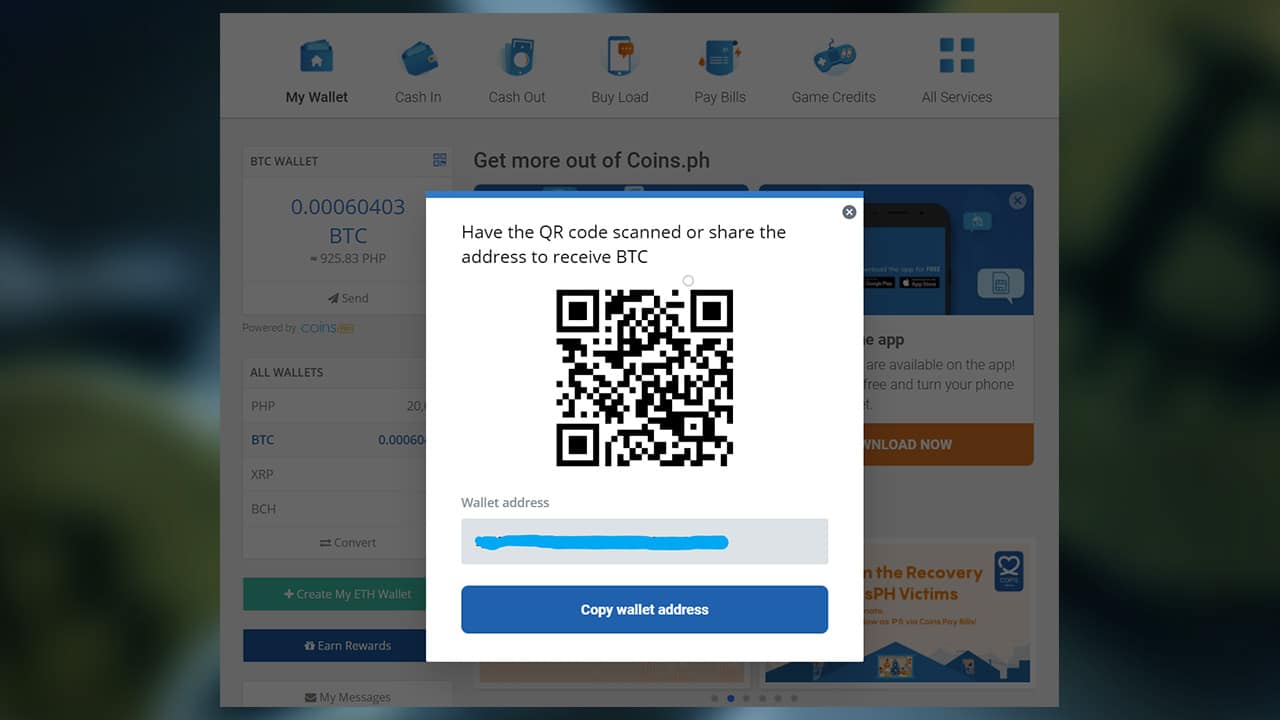
First, make an account at Coins.ph and get your Bitcoin wallet (not the Peso wallet) address from there. Click the BTC line under ‘All Wallets’, then click the QR code to copy the wallet address.

Then, go to your Nicehash account, go to the ‘Wallets’ tab, and click ‘Withdraw’.

Paste your Coins.ph Bitcoin wallet address on the Withdraw field, input the amount of Bitcoins you want to transfer, and finalize it. The minimum withdraw amount is 0.001BTC (around PhP 1500).

Convert your Bitcoin to Peso

Now that you’ve moved your Bitcoins from Nicehash into your Coins.ph account, it’s time to turn them into actual pesos that you can spend in your favorite carinderia.

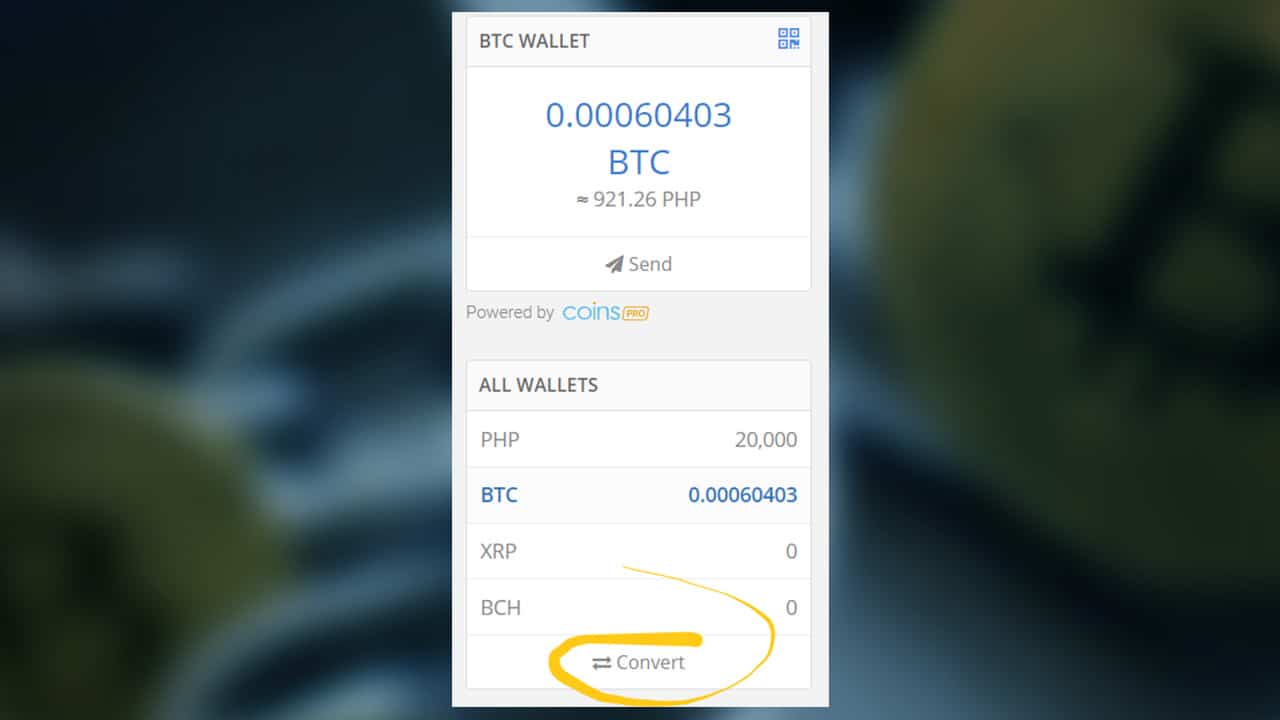
In your Coins.ph account, go again to your BTC wallet, then press ‘Convert’. This will enable you to exchange your Bitcoins to Pesos. It’s a similar process to when you go to a money changer to trade currencies.

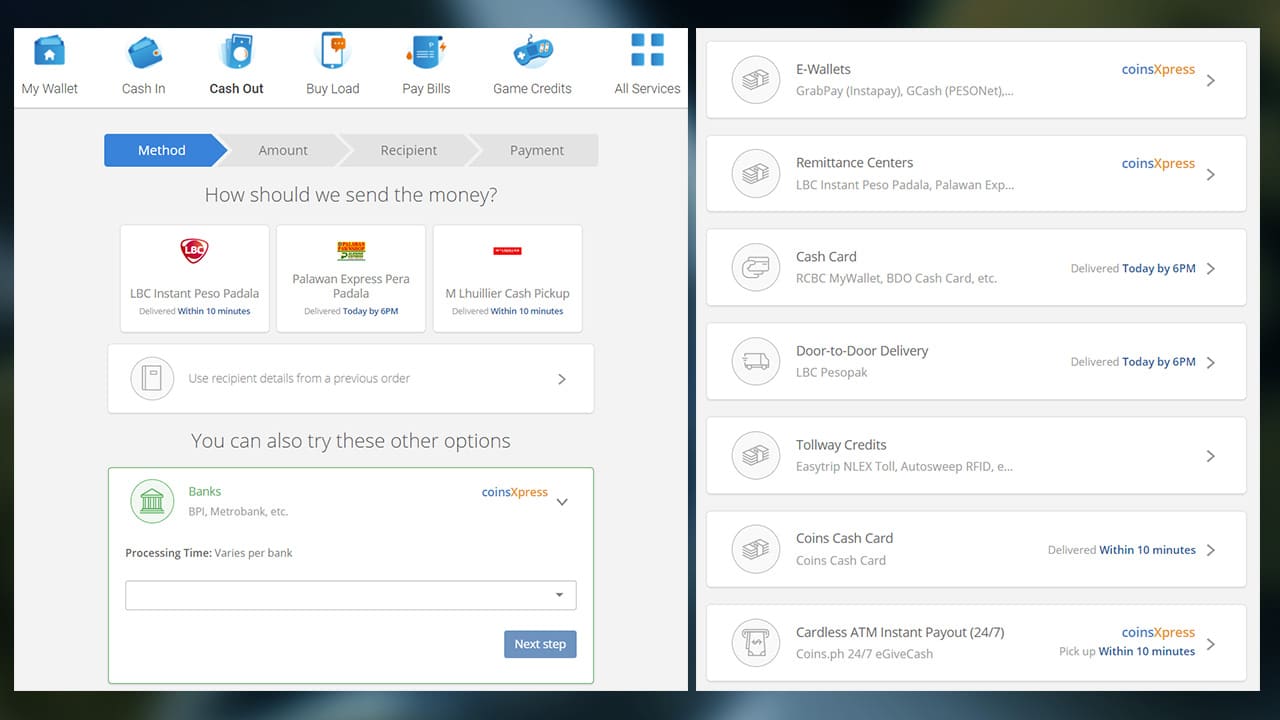
Once you’re done with the conversion, you can now get your pesos through various means.

You can ‘Cash Out’ your money and transfer it to various banks (BPI, BDO, Security Bank, etc.), e-wallets (GrabPay, GCash, etc.), remittance centers, and other options.

That’s it!

You’ve successfully mined and moved Bitcoins, and then converted them into pesos.

For casual miners, cryptocurrency mining is probably not enough to fully supplant the salary that a regular job pays, but as a completely passive source of income? Forgive the pun, but mining rocks!

If you have more questions – from specifics like “Isn’t it better to mine Etherium instead of Bitcoin nowadays?” or “how fast should my internet speed be for mining?”, or more nebulous inquiries such as “Should I invest in buying more cards for mining?” or even pragmatic concerns akin to whether or not mining actually harms your precious graphics cards, let us know!


REVIEWS