Lenovo Legion Go: A basic, beginner-friendly guide to initial setup

First of all, congratulations on your new Lenovo Legion Go handheld gaming console! Or maybe you’re still doing research? Either way, we’ve prepared a simple, beginner-friendly initial setup guide and walkthrough to get you gaming right away.

In our guide, we discuss what you’ll find inside the box, have a walkthrough of the device’s buttons and functions, and some optional upgrades as well if you’re willing to push this handheld console even further and see its true potential.

READ: Lenovo Legion Go essential accessories you should get first

Legion Go unboxing and walkthrough

The Lenovo Legion Go comes in a big ‘ol box, and unboxing it is pretty straightforward. Open it, and you’ll first see the case of the Lenovo Legion Go with the handheld sitting inside. Beside it, in a separate compartment, are the manuals and charger.

Open up the case, and you’ll find the Lenovo Legion Go staring right back at you. Lift it using the tab above it, and underneath you’ll find the controller base for FPS mode. More on that later.

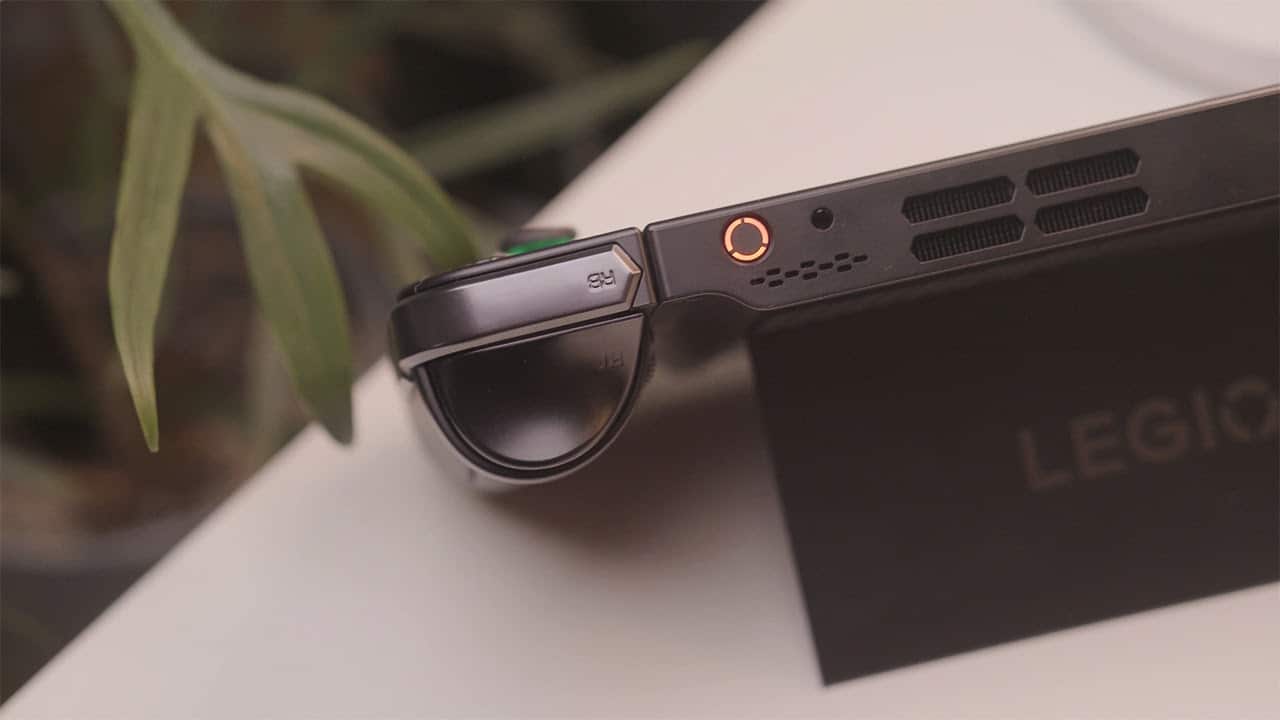
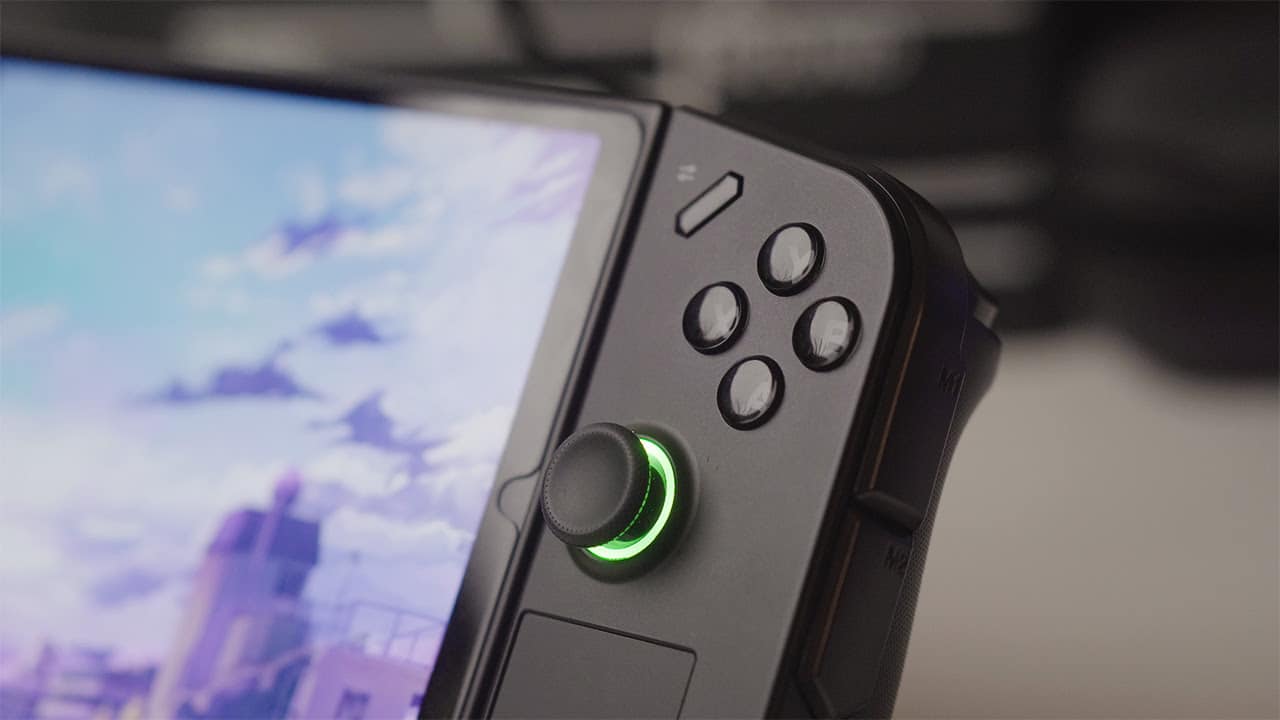
Now let’s familiarize ourselves with the device itself. First up is the prominent circular button on top of the device. It glows so it’s hard to miss, and as you may have figured out, this serves as the power/sleep button.

On this same edge, we also have one of the two USB 4.0 ports and the volume buttons as well. Either the top or bottom USB-C ports can be used to charge the device. Vents and speakers are located on both sides of the device.

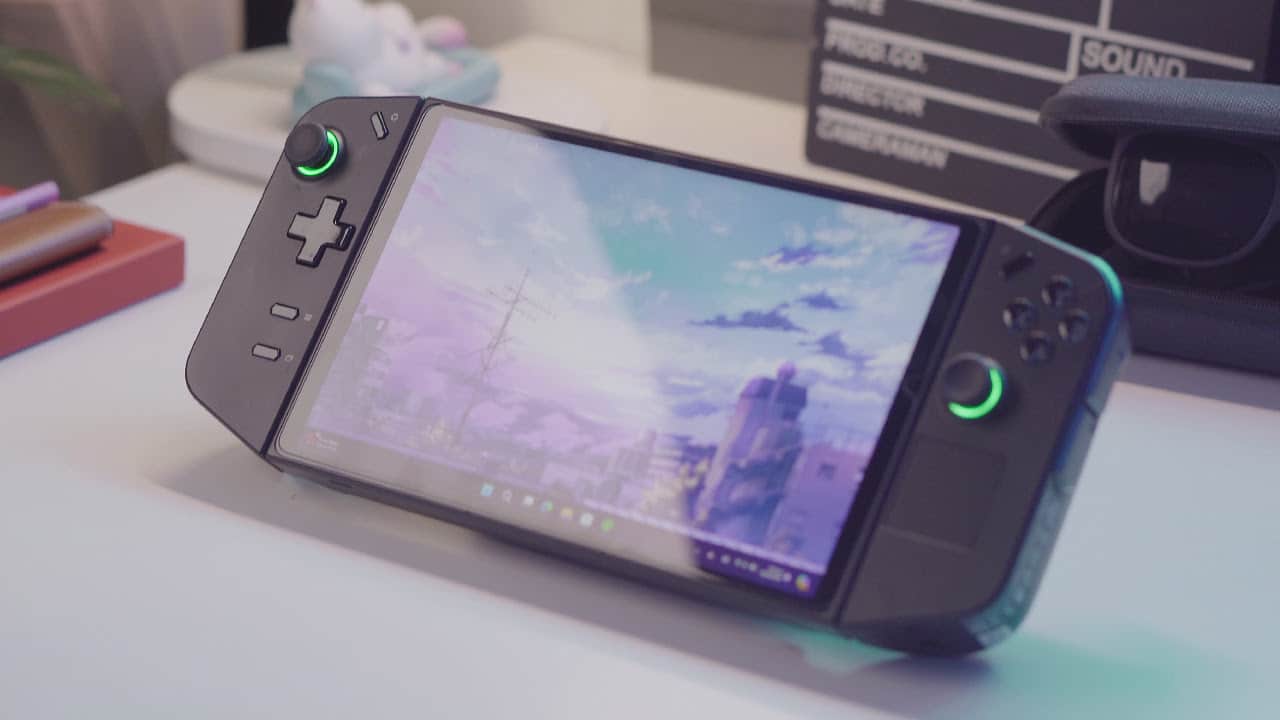
Flip it over, and you’ll see an almost unnoticeable kickstand. It’s a large one that sits flush, runs about the length of the device, and can also extend over 90 degrees.

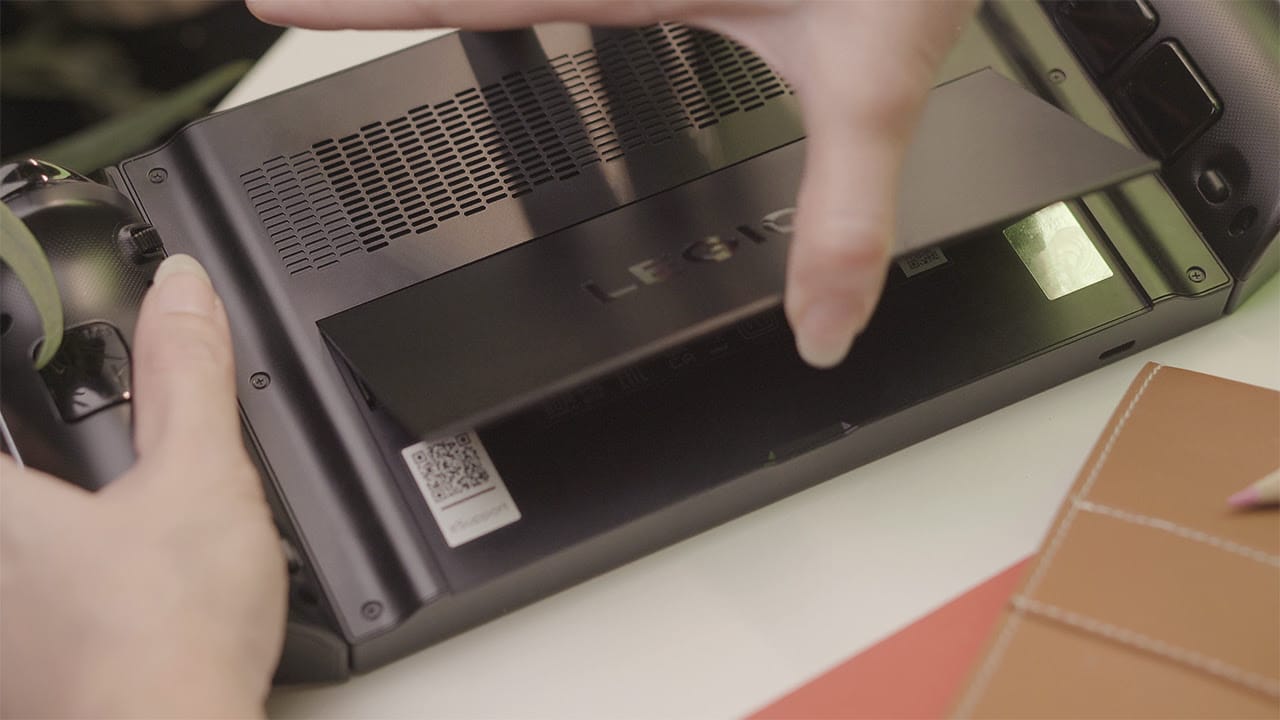
As you may already know, Lenovo Legion Go’s controllers are detachable, and to do this, simply hold onto the release latch located on the backside of the controller, near the bottom, and gently push the controllers down. Be gentle as you don’t need that much force or effort for the controllers to detach.

Legion Go controllers

And since we’re on it, let’s talk about those controllers. You’ve got a standard Xbox-mapped controller here with a few additional buttons for easier navigation.


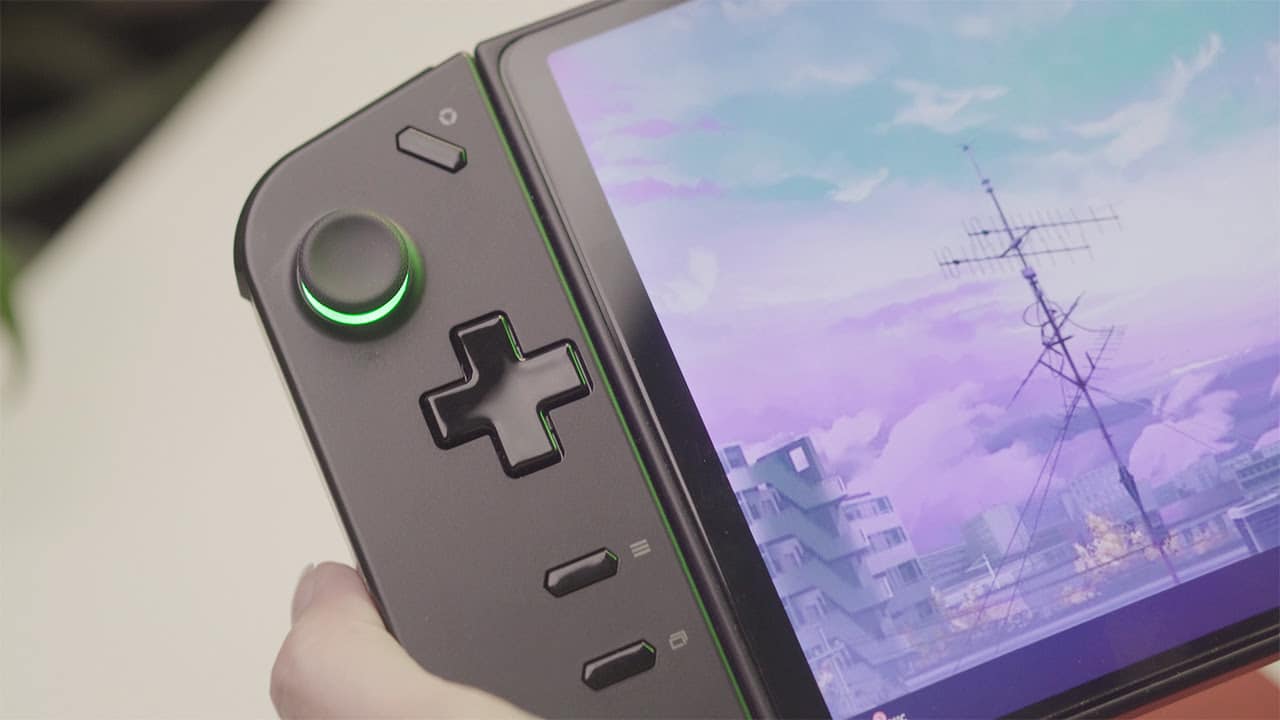
The left controller houses the analog stick and directional buttons, and above it is a button, officially named Legion L, that opens Legion Space — the Legion Go’s game launcher. More on that later.

On the left controller are two additional game buttons as well. Their functions differ depending on the game being played.

Moving over to the right controller, we have the traditional game buttons, another analog stick, and a mini trackpad below it. We have another shortcut button, Legion R, on top mirroring the one on the left.

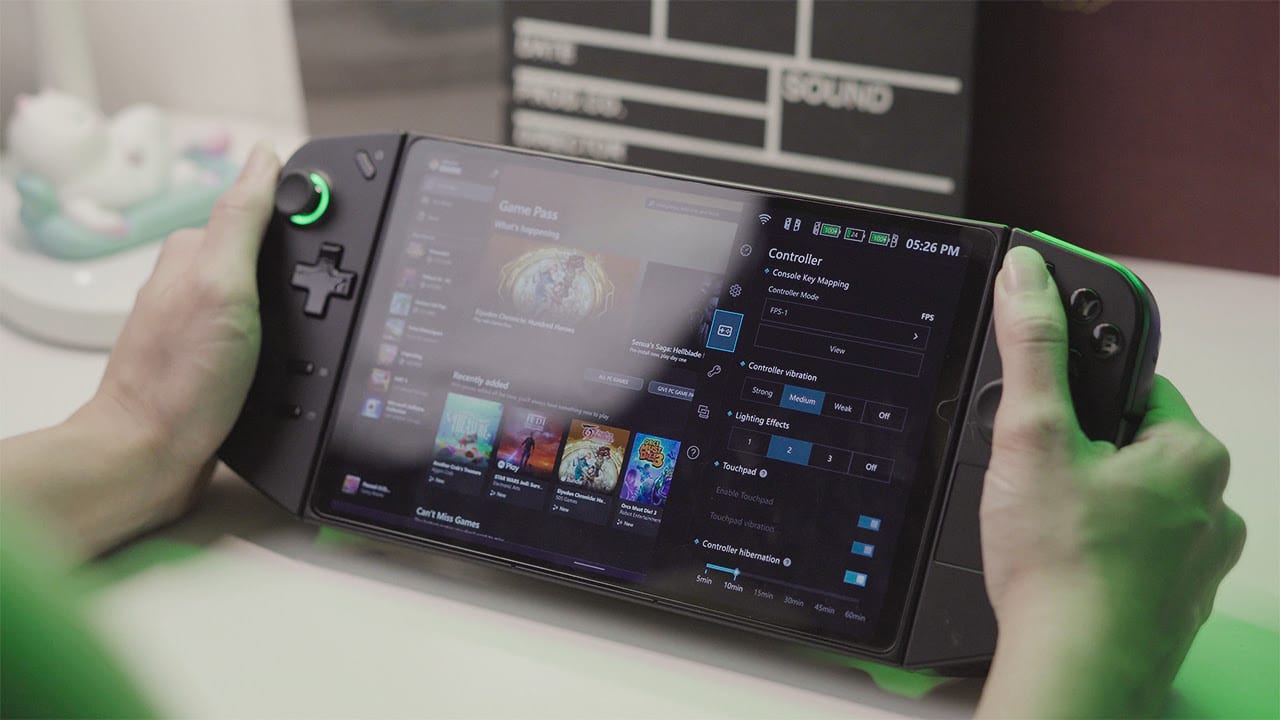
This button provides access to essential settings when using a handheld PC. Apart from usual settings like brightness and volume, it’s here where you can switch up your refresh rates, resolution, and other game settings on the fly.

Both controllers also have mappable back buttons and side buttons.

An additional tip, when detached, the controller state light will turn an amber color to indicate battery levels. A solid light means fully charged, and the faster the light blinks, the lower the battery level.

Legion Go controller modes

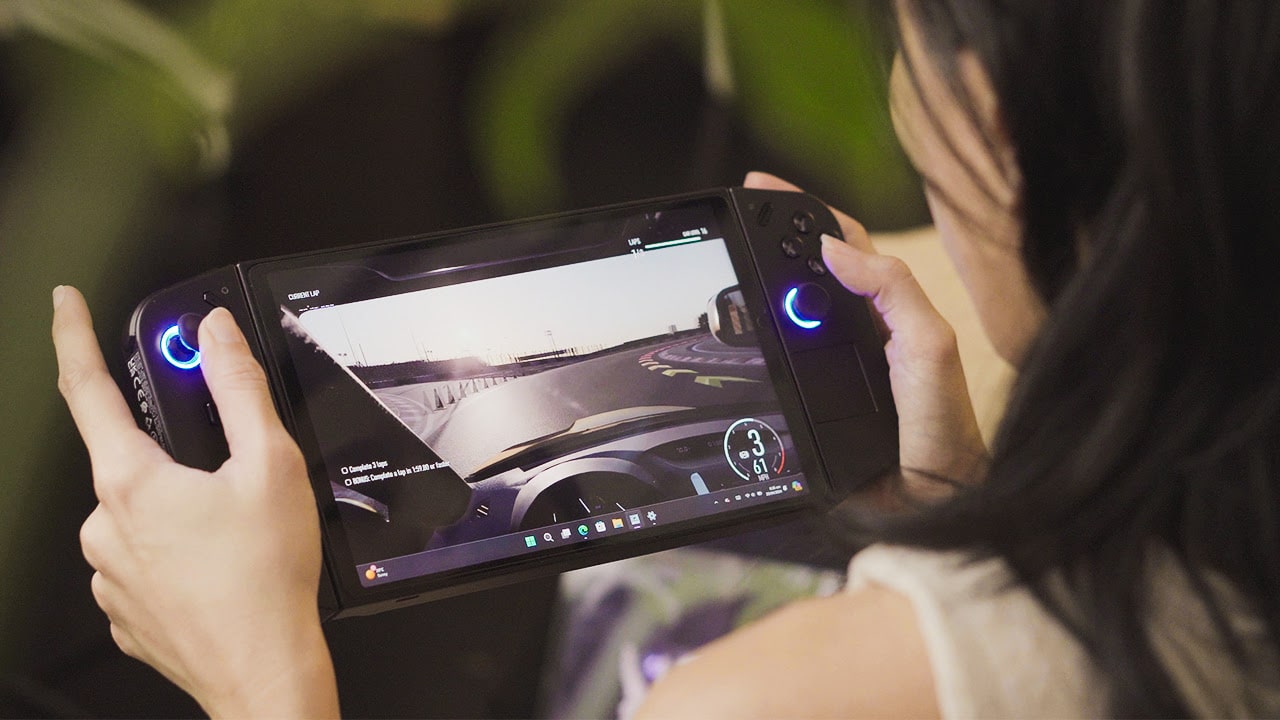
One of the best things about the Lenovo Legion Go is the different modes it can offer thanks to its detachable controllers.

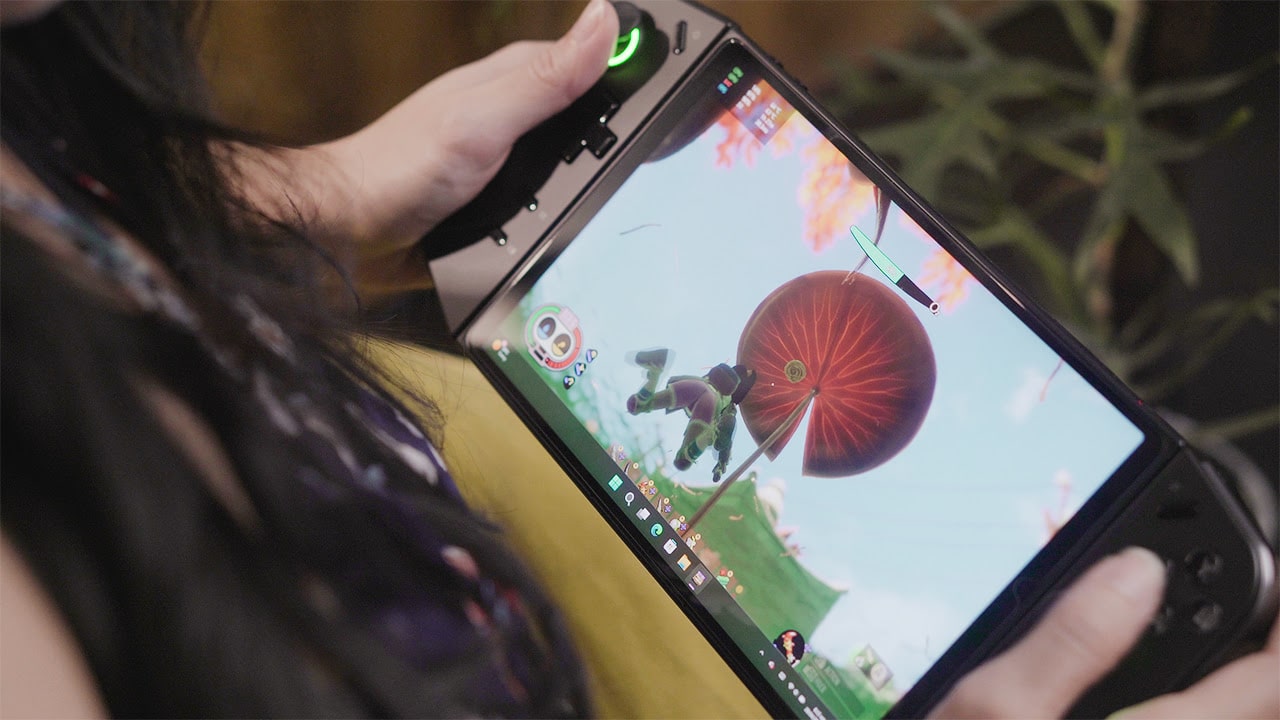
You’ll first meet the device in Handheld Mode, which is the most familiar. All games that support controllers should be able to do fine in this mode, but if you do need something more accurate, you can switch up to a pseudo-mouse-keyboard setup by entering FPS mode.

To enable FPS mode on the Lenovo Legion Go, first detach the controllers. Flip the right controller to find the switch to FPS mode. Grab the round magnetic controller base from inside the Lenovo Legion Go’s case and insert the right controller. This is now your vertical mouse.

Once you enter FPS mode, the back buttons for each controller are now activated. You can map the buttons natively in Legion Space or another third-party mapper should you have a preference. The left controller supposedly acts as your keyboard, but you will be limited to just the essential button or button combinations.

Tip: You can always attach a wireless/wired keyboard or pad if you want a better experience for FPS mode. Looking for more accessories? We have some suggestions here.

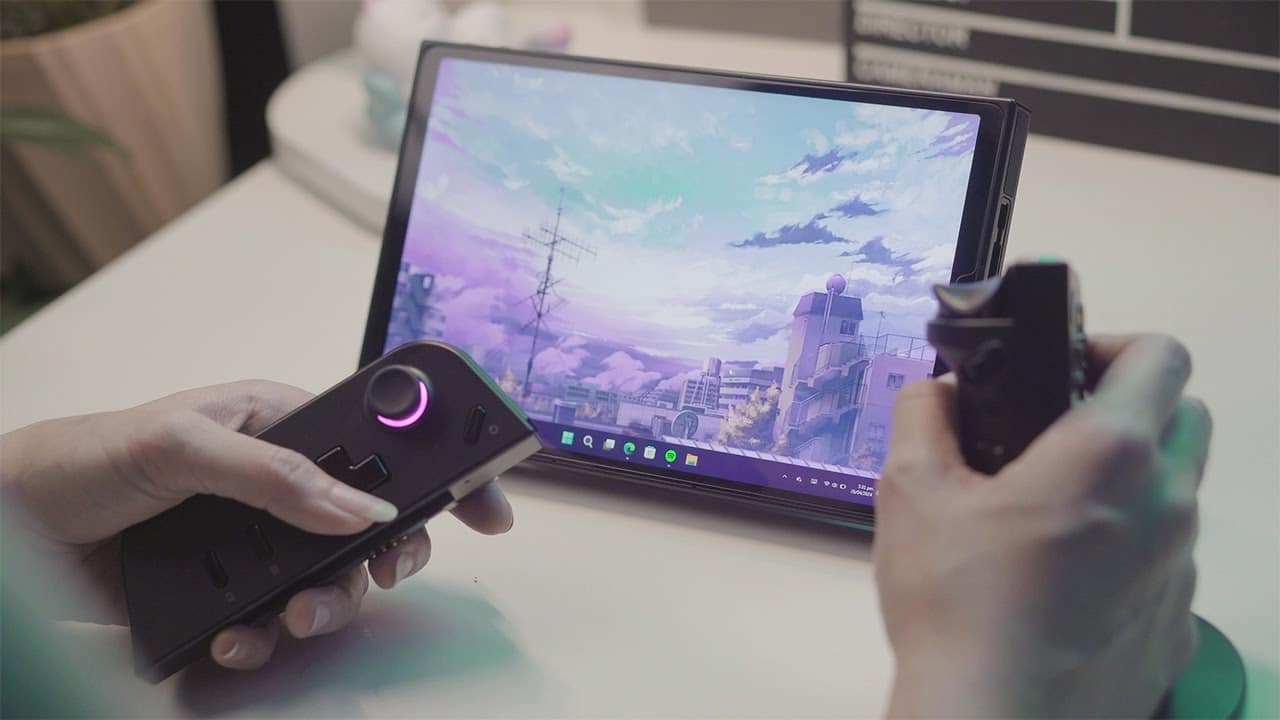
Apart from Handheld and FPS mode, the Lenovo Legion Go also comes in Detachable Mode, which is basically playing with the controllers detached and the main unit propped up somewhere else, and Battle Station Mode, where you prop the Legion Go on its kickstand and connect it to an external monitor for the full PC gaming experience.

Legion Go controller shortcuts

Being a full Windows PC on a handheld device, navigation can take some time to learn. While you do have a touch display and even a trackpad, it’s useful to know some Legion Go shortcuts.

Key comboFunction
Press and hold the Legion L button for 7 secondsTurns on/off the left controller
Press and hold the Legion R button for 7 secondsTurns on/off the right controller
Press Legion L + YSwitches between the preset Thermal Modes
Press Legion L + XOpens Windows snipping tool
Press Legion L + ASimulates Ctrl + Alt + Delete
Press Legion L + BOpens a virtual keyboard
Press Legion L + LBOpens the summary page of preset shortcuts

Controller lights/Battery level

Light statusBattery level
Continuous fast blinking10% – 12%
Fast blinking for 5 seconds13% – 30%
Slow blinking for 5 seconds31% – 89%
Solid 5-second light90% – 100%

Additionally, since this is a Windows mobile PC, you also have access to gesture controls.

Swipe down with 3 fingers from the top to bring back the desktop. Swipe from the side for task changer.

A 4-finger swipe left to right will switch between desktop spaces and a 3-finger left or right swipe will switch between the last two apps used.

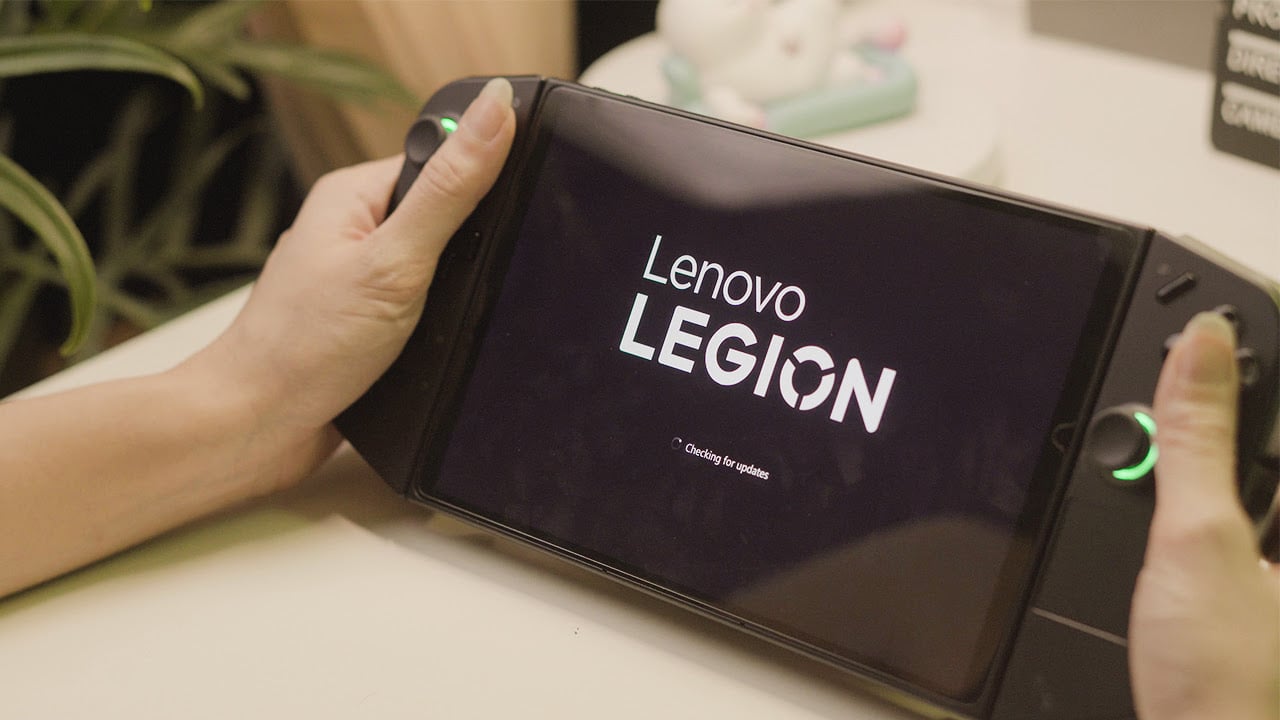
Initial boot and setup

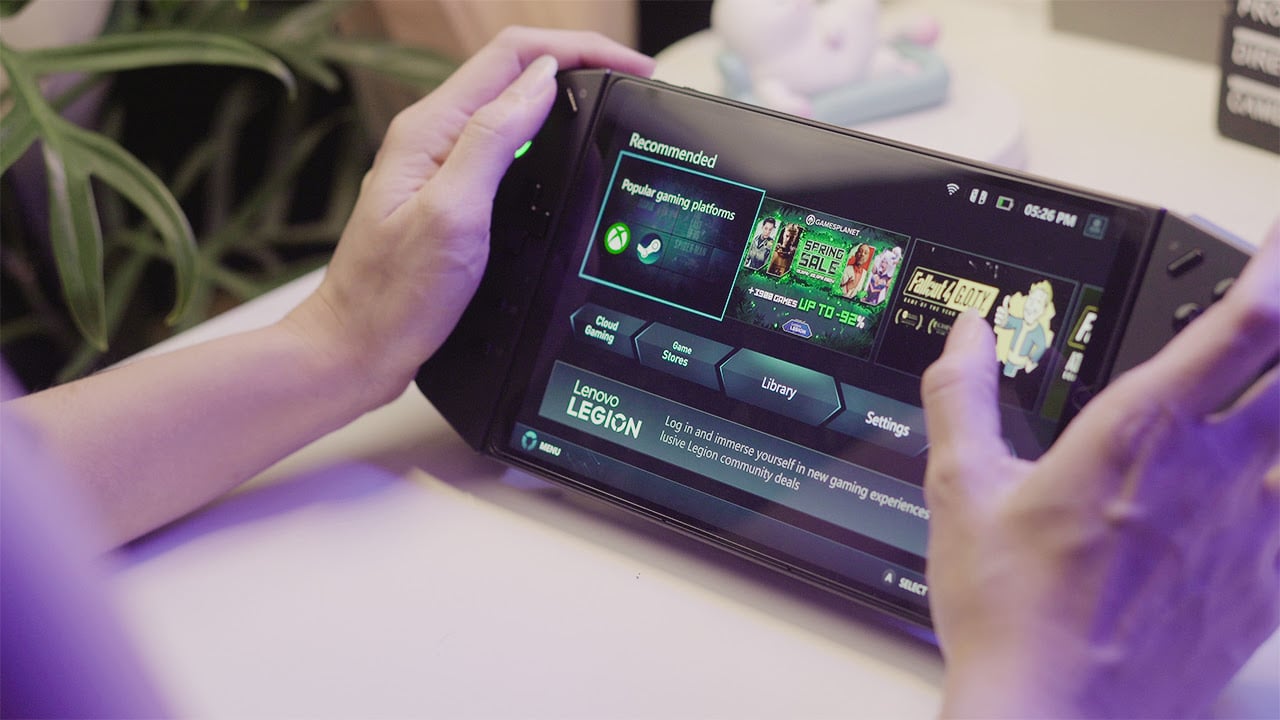
Power on the Lenovo Legion Go with the big button on its top edge. On the first boot, you’ll find that the setup is similar to setting up a PC. Go through the guided steps, and you should land inside Legion Space.

Specifically developed for the Legion Go, Legion Space is a hub for all the games found on your device. It also provides quick access to customization settings, button mapping, device settings, and even a gateway to purchase more games.

But using the Legion Space app isn’t at all mandatory. Simply exit it to gain access to your Desktop. Once you’ve gotten the initial setup out of the way, you can install your games as usual. The Lenovo Legion Go does come with a free 3-month subscription to PC Game Pass, and it’s one of the easier ways to get games on the Legion Go.

Tip: Legion Space boots up automatically at launch but you can turn this off within the settings of the app.

However, there have been reports of users having trouble accessing the pre-installed Xbox app. There are two solutions that have seemed to work for a lot. One is first turning off the Wi-Fi, opening the app and letting it load, turning the Wi-Fi back on, and connecting.

The second fix is to uninstall the Xbox app and download and install the non-Microsoft Store version from the official website. You’ll also want to make sure that the time and date of your device match the time and date of your Windows settings.

Alternatively, you can do direct installs or get games through other game stores like Steam or Epic. You may also want to go ahead and do any software/driver updates for your Windows OS and graphics to get the best performance from the Legion Go.

From here on (once you’ve downloaded your games, that is) it’s game time! Simply launch your game like normal. Adjust settings using the Legion R button as you go to further personalize each game experience.

You can keep it like this but advanced users do take an extra step to optimize the device. In case you’re interested, read on ahead.

Advanced optimization

One of the recommended things to do once you get your Legion Go is integer scaling. This will allow you to run games at half the native resolution of the Legion Go without sacrificing graphics quality too much — an ideal way to game while handheld as you’re using less processing power and extending battery life.


To enable integer scaling, first make sure all your graphics drivers are updated.  Open up AMD Adrenalin Control Panel, and under Gaming/Display, tick the box for GPU Scaling and set it to Full Panel. Then enable Integer Scaling. You can play around with the settings depending on your game.

Note: you’ll need to run games in Borderless/Windowed Fullscreen most of the time for this to work. You can toggle this inside the settings of your game.

Apart from that, users also suggest updating to the latest BIOS and upping the VRAM to further improve performance. Some have noticed that the VRAM of the Legion Go is set to 3GB at default while other handheld consoles are set to higher right out of the box. Please be advised that there is risk in doing this so proceed with caution.

First, download the latest BIOS available and extract the setup file inside. There will be a guided installation. Follow that, and you’ll be prompted to reboot.

To adjust the VRAM, first turn the Legion Go off. While it’s turned off, press the volume and power buttons simultaneously and wait for the Novo Button Menu to appear. Tap BIOS setup once available. Under More Settings/Configuration, change the UMA Buffer Size from 3G to 8G. Exit and save.

Optional improvements

A common complaint of a lot of Legion Go users is the quality of the speakers. Fortunately, there is a way to improve it, and it’s not hard to do.

Just open up your Realtek Audio Console app and head to the Speaker section on the left menu.

Now if you’re familiar with sound, feel free to play with the sliders, but if you want something that will give you better sound in one click, we suggest setting the equalizer to Powerful with Omni Sound on.

For ease of use, we also suggest setting the device’s power button to hibernate instead of sleep since the latter doesn’t seem to work properly on the Legion Go.

To switch the button’s function from sleep to hibernate, go to your Power Options in Windows Control Panel (under system and security) and click/tap on “Change settings that are currently unavailable”. Enable hibernate and assign the power button.

Final Thoughts

The majority of handheld gaming consoles are geared toward more serious gamers which makes it a little intimidating for those who want to give it a go. But as you may have read, you don’t have to go too deep into settings and customization to get started on gaming.

Once you’re comfortable or you have some help, go ahead and learn more. But if you want an easy way to upgrade your gaming experience, maybe adding a few accessories might help.

Search
-

Samsung Galaxy S20 FE review: The ‘almost-flagship’ phone you’d expect

With its cheaper price tag, the Samsung Galaxy S20 FE looks to be the “budget” model in the S20 family. But Samsung takes a different approach in configuring this model to make it more affordable. The FE in the device’s name stands for Fan Edition. This is simply the company’s way of saying that this device was created with fan-favorite features instead of just downgrading the specs of its higher-end siblings.

With so many similarities to the rest of the S20 devices, you might be wondering what would make you want to pick up the Samsung Galaxy S20 FE instead. Find out in this review if it’s the right S20 model for you.

Design

One of the major selling points of the Samsung Galaxy S20 FE is the number of colorways it has. With 6 different colors, it has the most variation in the S20 series. I personally love having so many color options since you’re rarely given more than 2 or 3 options for smartphones these days. Our unit came in Cloud Navy which is a great choice for a more subtle and professional look.

Color options aside, the build is solid and is actually a bit heavier than the Samsung Galaxy S20 and S20+. The back is made of polycarbonate plastic instead of glass which helped in making it more affordable. Despite that, it still feels durable and the rounded corners and edges provide a good, comfortable grip as well.

The back sports a matte finish that emits a subtle sheen when light hits it. The design is simple, making it appealing to all kinds of users. Despite having a matte back, we found it attracts smudges often and needs more than a quick wipe to keep it clean. The smudges aren’t actually noticeable from afar but are very obvious up close or in bright light.

As for buttons and ports, you can find the power button and volume rocker well within reach on the right side of the device. The dual SIM card tray is found at the top while the speakers and Type-C charging port are at the bottom. There is no 3.5mm headphone jack on the device.

Overall, the Samsung Galaxy S20 FE offers a very basic design that’s made interesting by the array of colors it offers. Compromise comes in the form of the plastic back but this isn’t a big deal unless you’re particular to glass. Additionally, it has IP68 water resistance meaning you won’t have to worry about it getting wet or even falling into water.

Display and Multimedia

The Samsung Galaxy S20 FE houses a 6.5-inch Super AMOLED display making it larger than the S20. The resolution has been lowered on this phone to just 2400×1080. But even so, that resolution is more than enough for the average user. Bezels are not as thin as the other S20 devices but remain hardly noticeable.

The Galaxy S20 FE was able to adopt a 120Hz high refresh rate which we personally appreciate. And not only is the screen fast, but it’s also very responsive. Taps and gestures registered immediately which made navigation a breeze. But as expected, having the 120Hz screen activated consumes more battery but you are given the option to manually set the refresh rate to just 60Hz. But personally, we found the 120Hz screen just looks so good that we decided to keep it on all the time.

Visually, we personally don’t have too many gripes. Colors are vivid and beautiful as expected of an AMOLED screen. The display is also able to consistently produce good and sharp images. Brightness is also more than sufficient with the display remaining visible even in bright conditions.

Watching or consuming content on the Samsung Galaxy S20 FE is enjoyable as well. The stereo speakers aren’t the most impressive but they are able to fill up a small room. Pairing that with the HDR-capable display makes for a good overall entertainment experience. Our only complaint is the position of the selfie camera which becomes a bit obtrusive when watching on full screen.

While the S20 FE’s display does deliver in producing great images, we find it falls short with the in-display fingerprint sensor. Unlike the other S20 device, it has an optical scanner instead of an ultrasonic one. This resulted in occasional unreliable readings.

We found that the best way to make the scanner work is to intentionally press your thumb flat down on the screen. This isn’t all too efficient especially if you’re working with one hand but thankfully there are other security options such as PIN unlock and camera face unlock.

Performance

Powering the Samsung S20 FE is an octa-core Exynos 990 processor matched with 8GB of RAM and 128GB of storage. Storage can be expanded up to 1TB by sacrificing one of the SIM card slots for a microSD card.

As expected, we personally didn’t experience any noticeable hiccups in using the device. Apps opened quickly and were very responsive. Even with multiple apps open and running, the phone didn’t exhibit any detectable drops in performance.

We did have an odd issue with its Wi-Fi. The device often had trouble connecting automatically to previously joined networks. There were many instances where it wouldn’t connect to our home network even if it knew the password. It’s not really a big problem nor does it really affect overall performance, but it is inconvenient and a tad bit frustrating to have to connect every time the phone goes to sleep.

Looking at the bigger picture, the top-tier performance still carries over in handling more power-hungry apps or games as well. The gameplay was fluid on games like Asphalt 9 or Wild Rift. It also handled Genshin Impact fairly well but couldn’t steadily accommodate the game’s highest settings. At times, it also had trouble rendering the game’s motion blur. However, lowering the settings down to mid or mid-high settings made for a smoother gaming experience.

After an hour or two, we noticed the phone starts getting hot. It’s definitely something to consider if you’re a user who likes to play for extended hours as the heat can get uncomfortable without any case on.

The Samsung S20 FE is shipped with One UI 2.5 which was made available just this year. The new version added gesture navigation which we love since this is our preferred way to move around the phone. A couple of other features added include built-in screen recording with the interchangeable audio source, improvements to the Samsung Keyboard, shareable Wi-Fi passwords through QR codes, among others.

One of the most prominent additions for this update includes DeX. This feature allows the phone to switch to a desktop view for use with a keyboard and mouse. Additionally, you can mirror your phone’s screen to a TV on the same network and use the phone for navigation by using gestures.

Cameras

The Samsung S20 FE’s cameras may not match up to the members of its family but it still houses a highly capable triple rear camera system. It carries a 12-megapixel ultra-wide, 12-megapixel wide range, and an 8-megapixel telephoto. The cameras perform just how you expect Samsung cameras would. Photos are clear, sharp, and saturated and will be able to please almost everyone.

We personally find that while it does perform well about the majority of the time, it sometimes produces images that are too saturated for our liking. This is an entirely personal preference though because, saturated colors or not, the image quality is still good. It also works very well in low light. The cameras are able to bring out details while maintaining fairly sharp details.

Samsung also added a 3x optical zoom and 30x Space Zoom on the telephoto camera. On a bright sunny day, the 30x optical zoom is able to produce acceptable photos. Edges are still a bit muddy but the overall photo is still something you’d be proud to post.

30x SuperZoom

Around the front is a 32-megapixel camera which is higher than what the Galaxy S20 and S20 Plus have. Considering its younger target market, offering a better front-facing camera just makes sense. It also offers a wide lens option so you can take group photos as well.

The lens is indeed sharp and performs exceptionally in bright light. Selfies are clear and crisp with just the right amount of saturation. There looks to be a bit of skin smoothing as well but it’s not at all obvious. There were times, though, some photos would look a little oversharpened.

Apart from your regular shooting mode, there are also other camera features including Live Focus, panorama, super slow motion, hyper-lapse, and more. It also has the Single Take feature found on its siblings that captures both photo and video on a single tap of the shutter button.

Bottom line, the Samsung S20 FE can capture really good, sharp, and colorful photos. Personal preference does come into play on how the images are processed but the phone does deliver on its promise of post-worthy photos right out of the camera.

Battery

The Galaxy S20 FE comes with a 4500mAh battery that supports fast charging with the 25W Super Fast Charger. It’s also equipped with Fast Wireless Charging 2.0 and Wireless PowerShare for charging other devices.

The 4500mAh battery can be good or bad depending on the kind of user you are. Again, since we prefer the look of a 120Hz screen, the battery was quick to drain. We had the device fully charged in the morning and we needed to charge again in the late afternoon even if we were just using it intermittently.

Switching to a 60Hz refresh rate showed a noticeable increase in the S20 FE’s battery life. The device survives a full day of average use that included social media surging, quick gaming sessions, taking photos, and more. If you’re the kind of person who wants a phone that lasts all day, you may have to compromise some settings to get that with the Samsung S20 FE.

Creature Feature

As always, in our reviews, The Modern Creatures aims to find special features in devices that make them worth having — something that gives a certain product an edge from its peers. And for the Samsung S20 FE, it would have to be the way its internals are mixed and matched.

The Samsung S20 FE gives reliable, high-end performance expected from a member of the S20 family. Despite having a lower price, the S20 FE adopts similar specs and, therefore, similar performance to the company’s current flagships.

Final Thoughts

In our time with the Samsung S20 FE, we would ask ourselves why would you buy this phone. There are a number of reasons but we found that the Samsung S20 FE is simply a perfect device for those looking for the best of Samsung’s features but aren’t willing to shell too much money.

All in all, the Samsung S20 FE does very well in choosing which features to keep and which to downgrade. You do have to settle for things like having a plastic back and optical fingerprint sensor but these are very sensible compromises to make. In turn, you get impressive performance, a good set of cameras, a high refresh rate, a really great UI, and a whole lot more useful features.

At PhP 35,990, the Samsung Galaxy S20 FE is more than just Samsung’s most affordable S20 device. It stands well on its own and is able to keep the features that matter. It’s great for those looking to get a taste of what Samsung flagships offer but aren’t ready to invest a lot of money just yet.

REVIEWS